Search This Blog

Showing posts with label Connectors. Show all posts

Thursday, 1 August 2019

Anderson power connectors

To improve on my portable power project I have bought a slightly higher power inverter. At 600W, the crocodile clips used on smaller models are inadequate and they tend to be wired with screw terminals.


To make it more convenient to swap over batteries, I have bought some 50 Amp power connectors.


I have not used Anderson connectors before and I am pleasantly pleased with how well they are designed.


Within the connector is a built in spring and the terminal pushes in and clips over that spring.


The 50 Amp connectors work with probably 13mm2 (6awg) down to 8mm2 (8awg) cable. Anything smaller and the crimp is unlikely to hold securely and anything larger will not fit in the enclosed terminal. I used 8mm2 flexible silicone insulated cable.


Using a big crimp tool, they are easy to fix. Holding them in place while doing so needed a little thinking about.


Adhesive lined heat shrink added with a hot air gun and the job's neat and tidy.


==

Monday, 7 August 2017

Ride height sensor connectors

When checking under the Discovery, I noticed that the connector housing is missing for one of the air suspension ride height sensors.


It appears to still be working OK so I've wrapped some tape round it for now. I would like to fix it properly at some point so I've been on a hunt for the connector.


It's a quite unique shape. With a little bit of research I'm fairly sure it is from the Micro Quadlok range, see the following from the manufacturer's site:
Housing: http://www.te.com/usa-en/product-1-967616-1.html
Contact pin: http://www.te.com/usa-en/product-1740336-1.html
Seal: http://www.te.com/usa-en/product-967056-1.html


They are available from RS Components with the associated components:
http://uk.rs-online.com/web/p/automotive-connectors/6801464/
http://uk.rs-online.com/web/p/automotive-connector-accessories/7180712/
http://uk.rs-online.com/web/p/automotive-connector-accessories/6802455/
Spelt in two different ways, so it needed multiple searches on the web site:
http://uk.rs-online.com/web/c/connectors/power-connectors/automotive-connector-accessories/?searchTerm=micro%20quadlok
http://uk.rs-online.com/web/c/connectors/power-connectors/automotive-connectors/?searchTerm=quadlock


I've also found a kit on e-bay which will be easier to buy but a bit more expensive:
http://www.ebay.co.uk/itm/Discovery-2-SLS-Air-Suspension-Ride-Height-Sensors-Harness-Connector-FREEPOST/172253397501


The clips that hold it on to the ride height sensor are a pain to get off so I have not yet managed to get the good one off. Once I have one in my hand to see close up, I'll practice releasing the latches before I have a go at the car again.

Saturday, 22 April 2017

Lucas 10AS connectors

The Lucas 10AS unit is used for a few functions in various Land Rovers. It was the standard immobiliser and alarm for many years in Land Rovers and Range Rovers c.1995 on.


A similar 2 button key fob (plip) was used for the Lucas 5AS, 10AS and the 27VT used in the Freelander 1 but not all the internals were the same. Some do not have the workings to activate the passive immobiliser coil required for Defenders and Discoveries but not the Freelander (from what I've read).


They all seam to be called 17TN key fobs but some are also called 3TXD, which is on the circuit board. If you are buying one, it probably needs to say that it will work with a Defender, to be sure it has the components required for the passive immobiliser.

The 10AS was used to control the interior lights so they fade out. In some models it controls the central door locking.


I plan to add central door locking and I would like to use the original style remote controls.

OBD connector

Lucas 10AS with connectors

The first step in achieving that is to rig up a test setup for which I needed some connectors.

These are a standard component, still in use. They are from the TE Multilock range and use the 040 and 070 terminal sizes. All of the Multilock bits together came to less than £10 from RS Components. I bought the OBD socket from e-bay for about £2.


Larger terminal

Smaller terminal

The RS Components and the manufacturers part numbers can be seen in the photos.
The manufacturers parts numbers are:
173851-4 Green connector housing
174516-6 Grey connector housing
173631-1 070 crimp terminal (for the green and outer pins of the grey sockets)
173716-1 040 crimp terminal (for the centre pins of the grey socket)

The last digit following the dash for the plugs, indicates the colour; -6 = grey and -4 = green.

The idea is to rig up a test loom so I can check the function of the door locks without dismantling the dash and crawling round inside the car until it is all working.

==

Related articles:
http://blog.discoverthat.co.uk/2018/06/central-locking-poc.html
https://blog.discoverthat.co.uk/2018/06/swapping-10as-immobiliser.html

External Links:
http://www.gomog.com/allmorgan/LandRoverSecurityManual.pdf

==

Sunday, 19 February 2017

Side repeater LED holder

Not a very catchy title but difficult to know what else to describe this as.


One of the side indicator repeaters on Fender had a dodgy connection. Not the easiest thing to repair as it is permanently connected in to the car wiring loom.

There are repair kits available where you cut it out, add a connector on the loom and plug in a new harness. I thought I could make my own.

Although it would be a struggle to make a bulb holder I thought I could more easily make an LED lamp holder with the LED soldered on. Being LED they have a long life expectancy so they can be permanently attached. Very much like the LED lamps that are available for the other lights.


There are plenty of LED repeaters in the TD5 or newer style but I have designed my own to fit the 300TDi and older squarer style. These are 3D printed.


I designed the holder with supports built in to the model. That way I can make the supports easier to remove.


Instead of being connected permanently in to the main harness I have added 
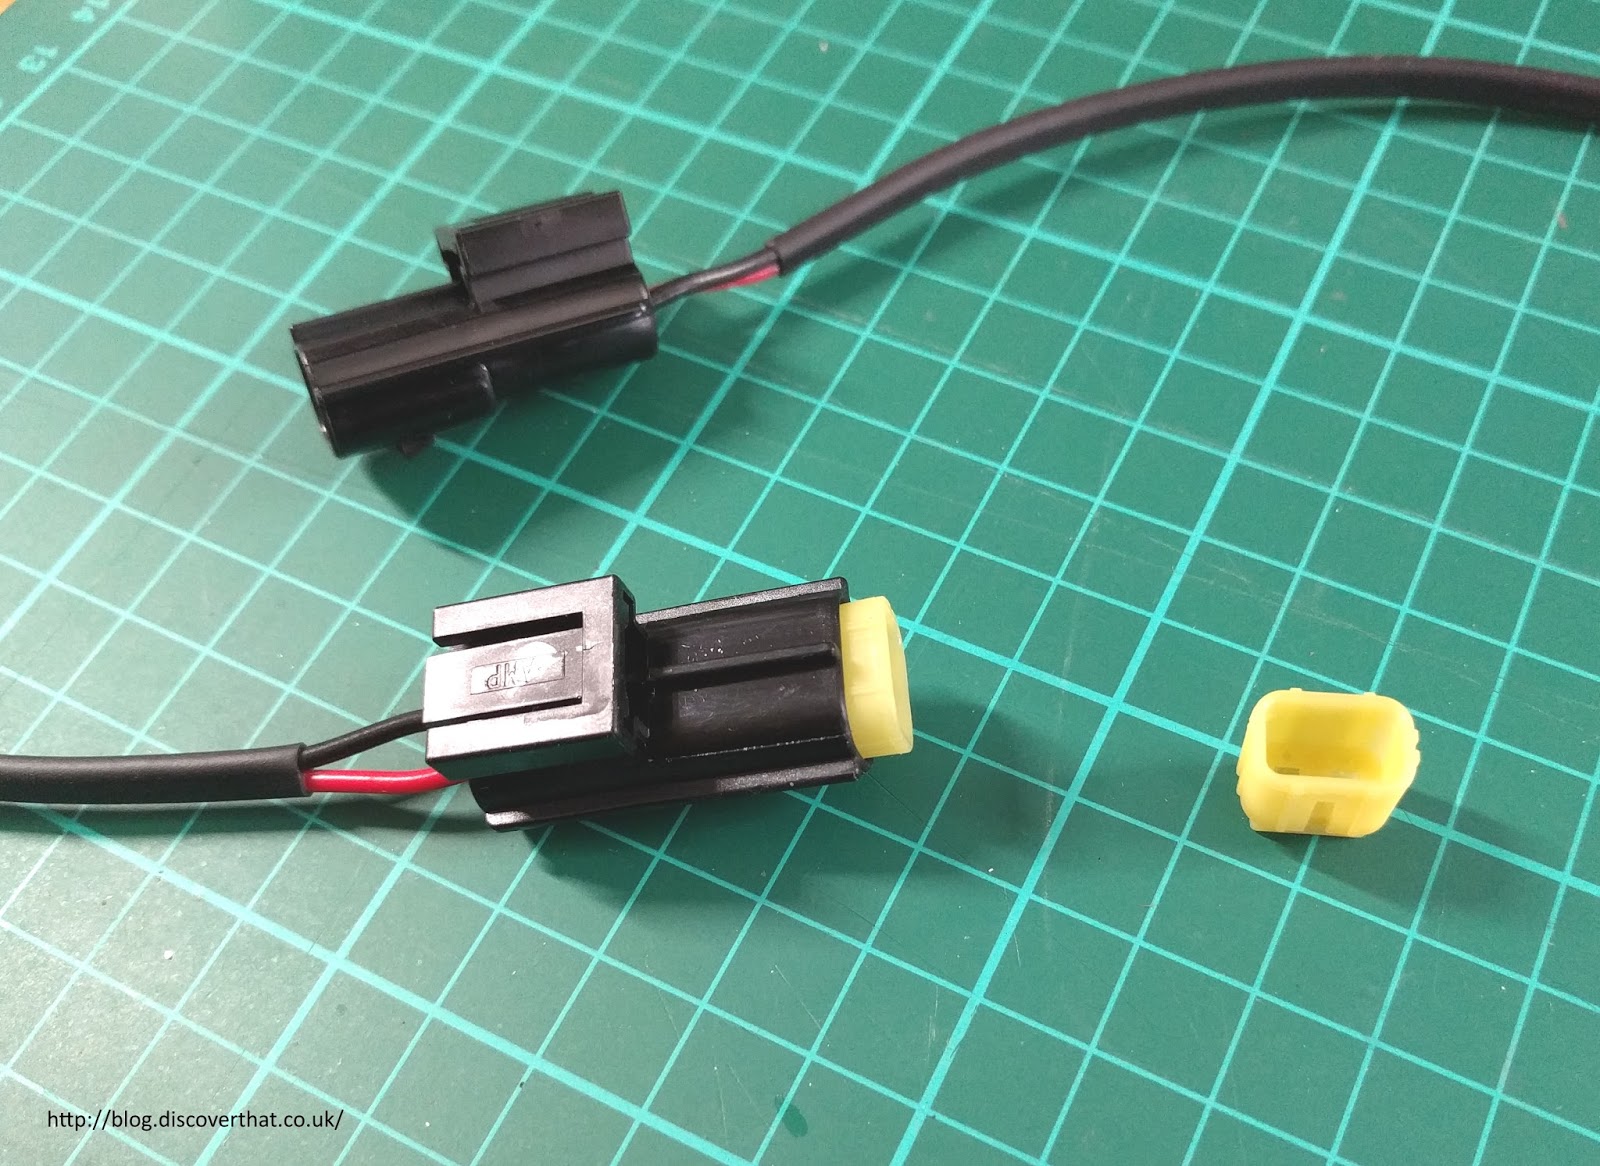
Econoseal connectors, the same as used on the other indicator lights by Land Rover. To be consistent, I've deliberately wired them the same way round.


If all you want to do is fit an LED to the side repeater, the easiest thing to do is just plug in one of the 501 (W5W) LED replacements. You do have to be careful what size they are.

By trial and error I have found out that many of the W5W replacement LED bulbs are too long to fit the existing indicator repeater lenses. As I had several of these oversize LED lamps I've designed the holder to fit these. Any shorter LED W5Ws would obviously also fit.


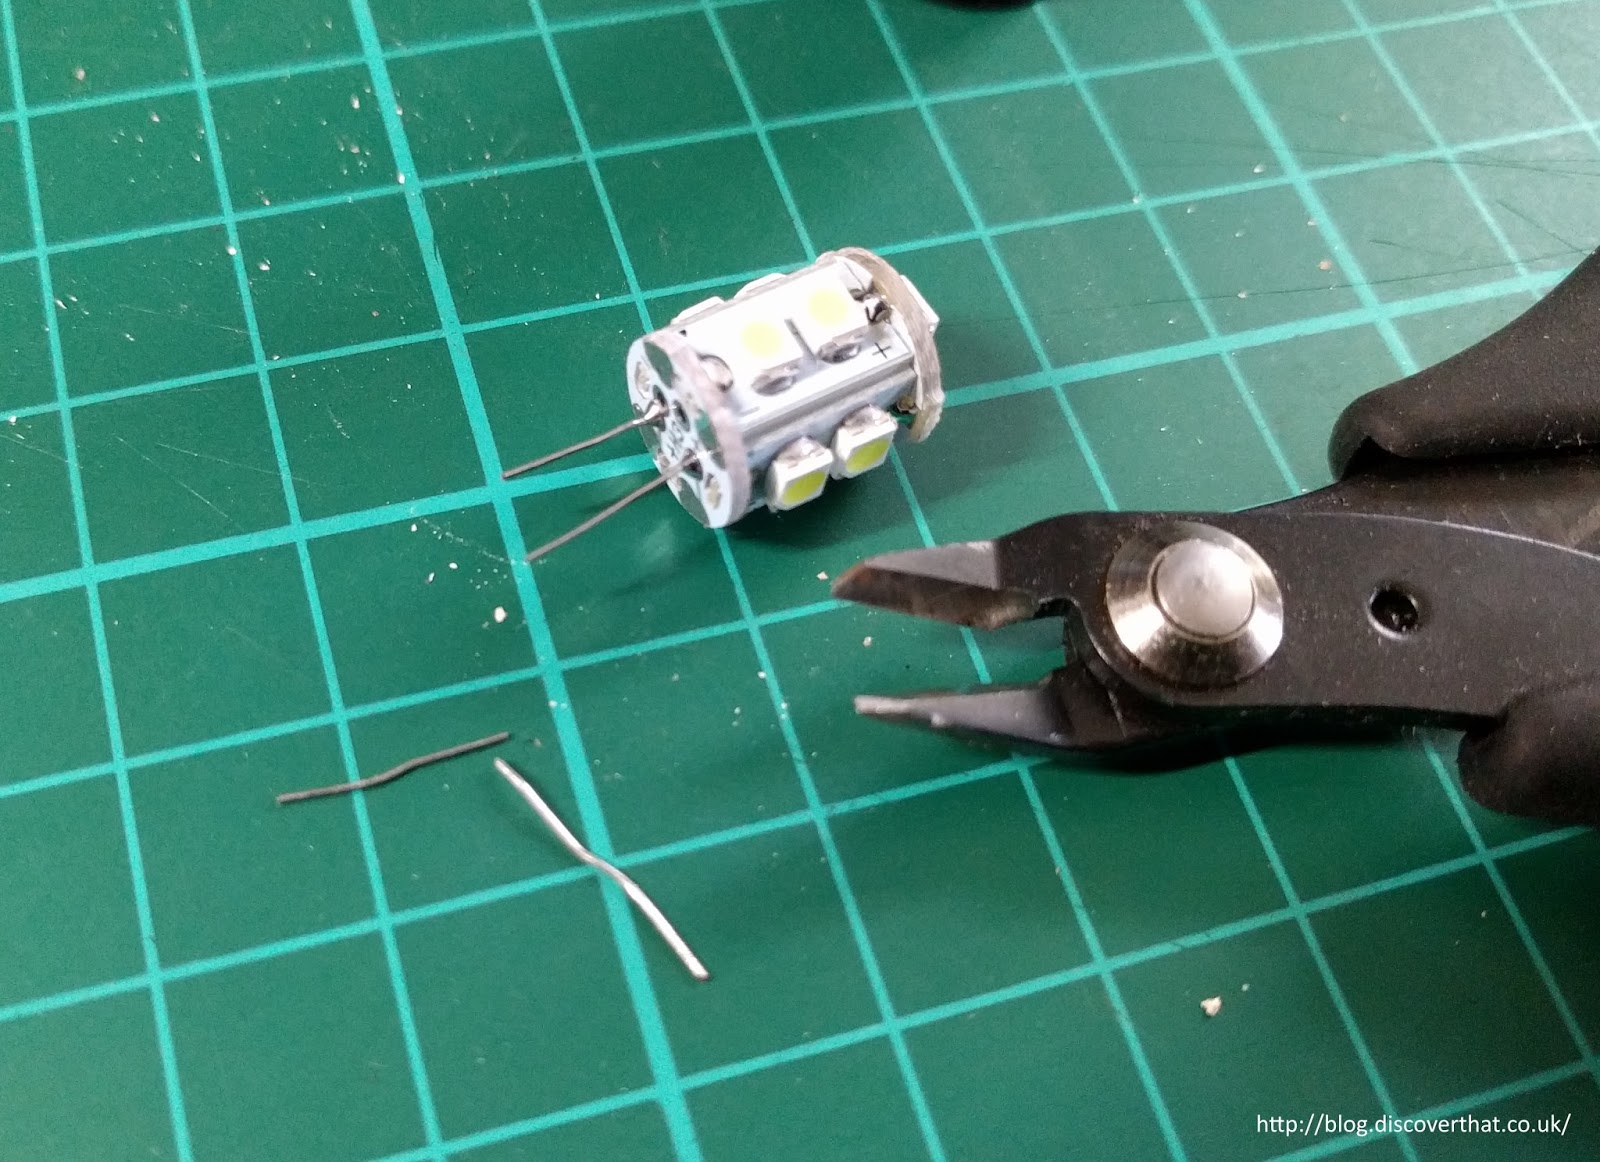
Typically the LED's are held in to their plug by simply having the wires bent over. This is similar to the original design of the glass W5W lamps. By unbending the wires the LED section comes out easily and can be slipped in to my 3D printed holder.


The wires on the cable are pushed through the holder and soldered on to the legs of the LED close to the base of the LED.


The holes for the wires in the prototype would only just fit a 1mm2 cable. I've adjusted the 3D model to have larger holes. It will probably still be a tight fit.


The harness is about 350mm long with 20mm exposed at the lamp end and 30mm exposed for the Econoseal connectors.


No more than 10mm of un-insulated leg should remain exposed. The wires are pulled back down so the solder joint is protected and insulated by the plastic holder.

It's important to get the wires the right way round because LED's have a polarity.


The ones I had were marked + and - but they are easily tested with a small 9V battery.


I added the Econoseal connectors and the rubber O ring.


I could have reused the old O rings but I happened to have a box of assorted and one was a good fit.

Left poor fit - Right better crimp results

Worth noting that if you work with the small pins, on things like the Econoseal connectors, a better quality crimp tool makes the job a lot easier.


Once in place the leads are held in to the holder and made water tight by filling the base with mastic. I've used black RTV silicone sealant. It would work equally well with potting resin if you have any to hand.


On the car the old holder is cropped off and the corresponding connector added to those leads.

I found it easier to work through the side light hole as the repeater wires just reached.


Reassemble the car and test all the lights.


Immediately afterwards Shelley took the car for a test drive :-)

==

Cura 3D printer settings

Downloads:
Side Repeater Blend file
Side Repeater STL file
Licence attribution

==