Search This Blog

Showing posts with label Woodwork. Show all posts

Sunday, 28 December 2025

Oil painting drying rack

Just before I finished making this, Shelley said, she'd like something like that for her studio. I had to laugh, because that is exactly what this is for.


I made it because she needed more places to store her paintings. It is now in her studio drying oil paintings.


I had looked for something ready made, but I was disappointed with the quality or style. I decided to make my own out of beech.


==


Friday, 12 February 2021

Fold up desk

We have a short term need for two desks in our study.

I've made a fold up desk from some materials I had in store. It's narrow and folds flat so that it can be tucked behind a cupboard when not in use.


I'm pleased with the result and it works well.

==

Update:

A slight change to better suit the uneven nature of the live edge top.

==


Wednesday, 8 April 2020

Lunchtime build

I'm taking advantage of working at home during the Covid-19 isolation.


I made a shoe rack, mainly to store the bike helmets but it also tidies up some shoes and boots.


Done before work and lunch times, over two days. The second day was oiling and drying time.

==

Sunday, 5 August 2018

Outside table

As part of my tidying up I came across the large galvanised coal bucket that we have.


It was going to be used for plants but it is such a nice bit of steelwork, I am reluctant to punch drainage holes in it. I decided to turn it in to a table instead.


Just upended with a heavy bit of unknown hardwood resting in place as the top.


I screwed battens under to keep it aligned and roughly level. I gave it a couple of thick coats of varnish to help protect it from the elements.


==

Friday, 13 July 2018

Rustic reclaimed crate

Shelley has a surplus of old hand made pots that she sells from, a friend, Dean's stand when he does various local gardening shows and farmers markets.


To display them nicely, I have made some old looking wooden crates out of reclaimed timber from pallets.


Breaking up pallets is more work than it's worth. To minimise the effort and to avoid having to remove any nails, the crates are designed to be the size between the joints so that only sawing is necessary.


They are held together with 50mm x 3.2mm zinc coated ring nails.

==

Sunday, 3 December 2017

Odd shape table

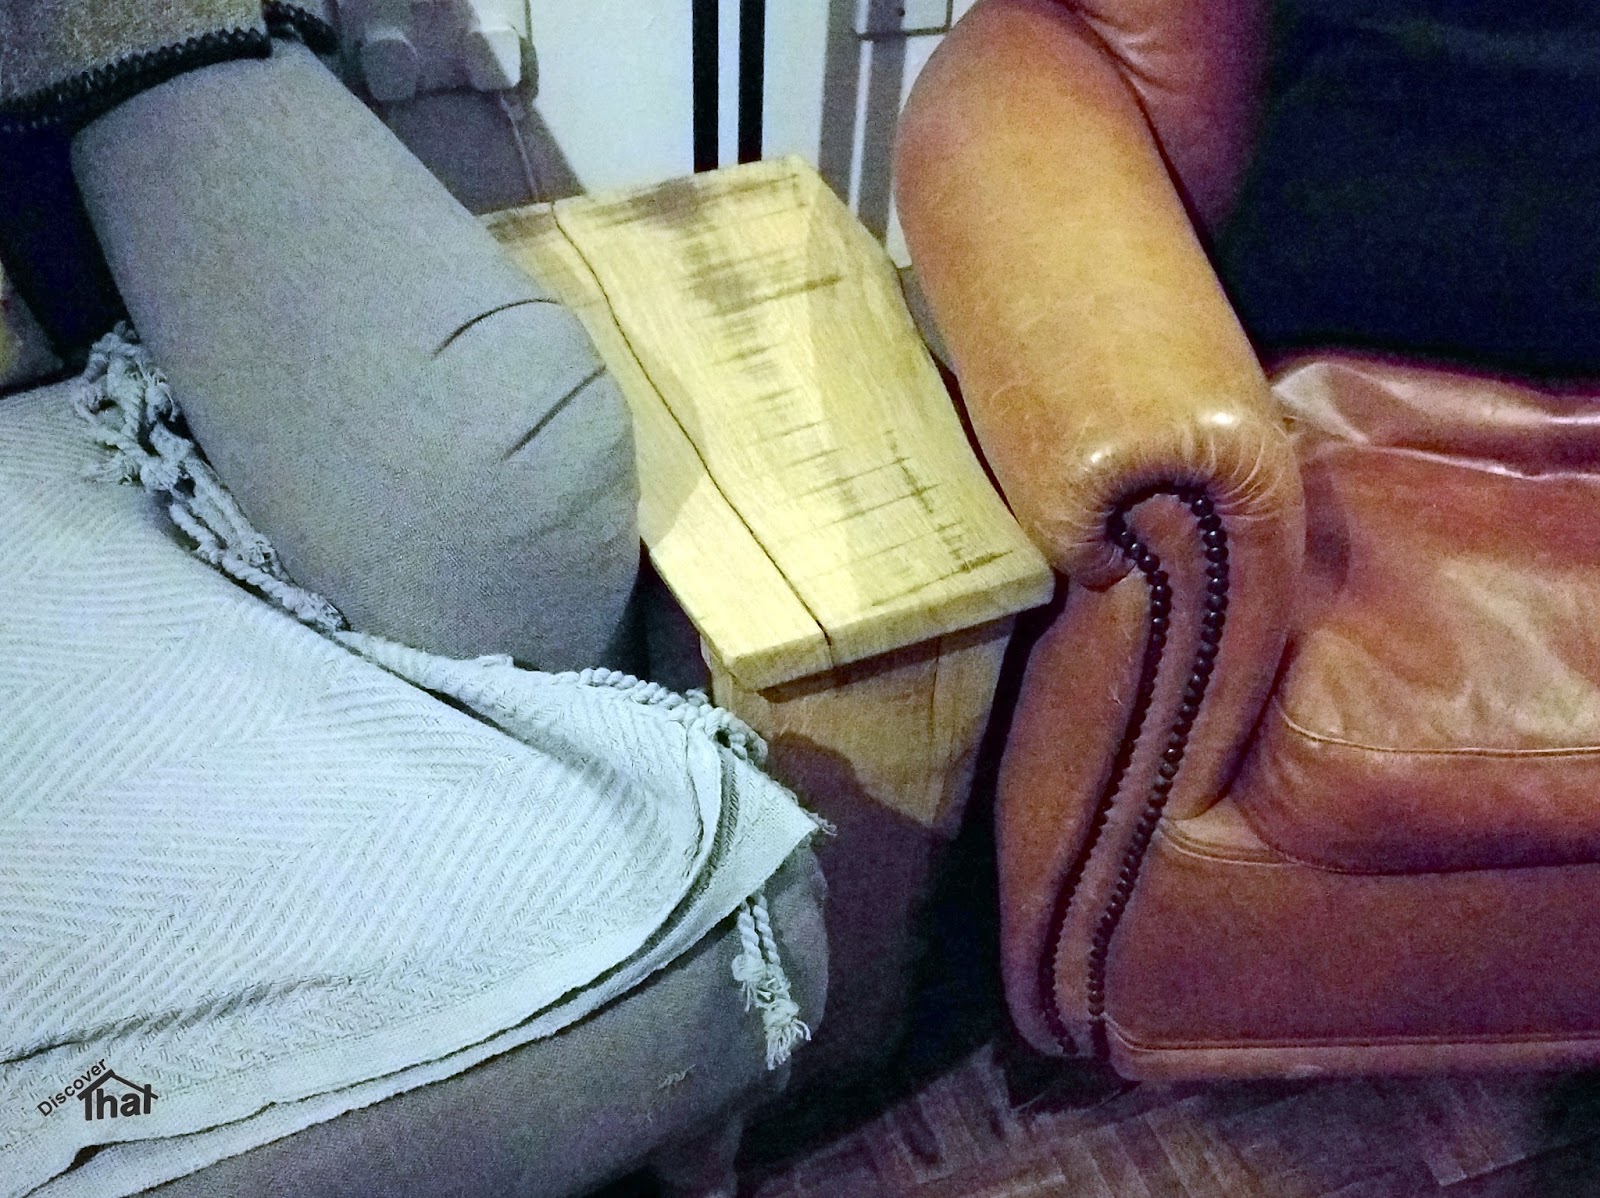
Our new sofa arrived yesterday and after we re-arranged the living room we were left without enough places to put our cups of tea on. In our house, that's a problem that needs a quick solution.


As I had done before I made a small side table out of off-cuts of oak I had in the shed.


One bit of timber was a convenient angle to fit the triangle between the sofa and the arm chair.


The design was made up on the fly based on the few bits of oak I had.


The top, front leg and lower shelf are all cut from the same misshapen plank.


Being late autumn and a bit cold we have the range lit and so the kitchen is very warm. So warm that the varnish dried much quicker than normal. I was able to get both coats on in the same afternoon and it was dry enough to use that same evening!


==
Monday, 27 November 2017

Kitchen tidy

Just some quick racks to keep a few bits and pieces tidy in the kitchen.


One is to keep all bottle openers and stoppers together.


The other two are to collect the salt and pepper that always falls out the bottom of the grinders and previously messed up the kitchen surfaces and dining table.

They are all made from two off-cuts of timber. Holes cut through the top piece with a tank cutter or drill, glued and screwed together. Sanded smooth on a belt sander and finished with bees wax and polished.

Sunday, 8 October 2017

Drawer to display cabinet

We bought an old newsprint storage drawer a few weeks ago.


I've carefully cleaned it up avoiding what I assume is lead dust from the letters that would have been stored in it and converted it in to a wall mounted display cabinet.


I chose to cover it in a thick layer of varnish both to seal in any remaining dust plus to strengthen the very thin dry dividers.


I had some 3mm clear acrylic sheet cut to size and added a rail at the top to use as a hook. I've put a facing strip at the front and screwed through to a batten behind. I've used a bit of adhesive as well so the stress is not concentrated at the screws.


I used a couple of hand made brass pins to support the batten holding the clear front in place.


Stained and polished to match the original. With some brass fixings to take in to account that the box joints were designed for a drawer not a hanging display cabinet.


I think it looks very nice.

==