Search This Blog

Showing posts with label Arduino. Show all posts

Saturday, 27 May 2017

Steampunk alarm case


The mad scientist in me could not resist creating a steampunk inspired case for the alarm receiver that goes with my driveway alarm.


The workings are based on a NodeMCU with some LEDs and a passive buzzer. It flashes and beeps in the event that anyone triggers the IR beams across the driveway.


The case is made from odd scraps of sapele or similar timber I had in the shed and a 3D printed insert.


It's adorned with some watch cogs and gears, some tiny glass bottles, some brass bar, and copper wire.

Making sure the capacitive switches work with the copper wire


The components to fit in


The aerial end of the NodeMCU is deliberately inside the plastic dome to minimise the wireless absorption that it might have had from the timber.


Lemmy, helping, again :-)


The copper wire is connected to two capacitive touch switches.

Solder a connector on to the touch pad

I've used off the shelf capacitive switches from e-bay, as usual.


The large coil acknowledges the alarm and resets the LED's and the small staple like wires silences the alarm for a few minutes as well as resetting the LED's.


The bottles are filled with two part epoxy resin that I coloured with a few drops of acrylic paint at the mixing stage. I made a paper tube to avoid getting the resin on the rim of the tiny bottles.


==

Sunday, 7 May 2017

ESP8266 network broadcast

I've written a short sketch to show some of the calculations used for networking and broadcasts. This is for the NodeMCU using the Arduino IDE

I did this because I was looking for examples of networking and came across so many examples of incorrect assumptions and unnecessarily complicated code especially related to broadcast messages. It was difficult to isolate the correct information from the incorrect.

Broadcast

A big area of confusion is over broadcasts and multicast. These are two DIFFERENT things. Nearly always what people will want to use is BROADCAST.

Broadcasts are sent as normal packets but with the broadcast address as the destination. All clients receive broadcast packets that have been sent on their subnet. Broadcast packets are not forwarded by routers so they are just for the local network.
https://en.wikipedia.org/wiki/Unicast
https://en.wikipedia.org/wiki/Broadcasting_(networking)
https://en.wikipedia.org/wiki/Multicast

Subnets

I see lots of assumptions about subnets. Most people's home networks are class C so simply changing the last octet to 255 makes it the broadcast address. That works for a class C subnet but is wrong for most other subnets.

Subnets can be any number of bits not just the common and simplified 8 bit class A, 16 bit class B or 24 bit class C.
https://en.wikipedia.org/wiki/Subnetwork

Ports

The network port is usually understood. Although any integer up to 65535 can be used, it is best to stay between 1024 and 65535. You can only read packets that are sent to the port being listened to.
It is probably best to pick a port not commonly used. There are list of registered ports usage.
https://en.wikipedia.org/wiki/List_of_TCP_and_UDP_port_numbers

Binary Calculations

The following shows the calculation to get the broadcast address for any subnet and how to send broadcast packets.


#include "ESP8266WiFi.h"
#include "WiFiUdp.h"

// The port can be any integer between 1024 and 65535
const unsigned int NET_PORT = 58266;
// This uses the ESP8266 UDP class
WiFiUDP Udp;
// The network packet payload
char NetMsg_Something[] = "YourMessage";

// Let everyone else on the network know this device is present
void BroadcastPresence(){
  // Calculate this network broadcast address
  IPAddress broadcastIP = ~WiFi.subnetMask() | WiFi.gatewayIP();
  // A broadcast packet goes to every host on the subnet.
  // It is a NORMAL packet but sent to a specific address.
  Udp.beginPacket(broadcastIP, NET_PORT);
  Udp.write(NetMsg_Something);
  Udp.endPacket();
}


The example sketch that you can download, using the link at the end of this article, requires two NodeMCU's running the same code so they can broadcast to each other.


Sending broadcast packets should be simple but there is some doubt if all WiFi Access Points forward network broadcast packets.

Network Address Calculations

The broadcast packets worked on my network but if I find a network where they don't, it would be fairly easy to create a loop to send a unicast packet to all the possible IP addresses on any given subnet.

For a few networking situations, including the above work round, a few details are needed. They are the first or last address on the network and the number of usable hosts. Those calculations are easy with a bit of binary and simple maths.


// This shows the very simple maths required to calculate some
// useful network information
void NetworkAddressCalculations(){
  // Calculate this network broadcast address
  IPAddress broadcastIP = ~WiFi.subnetMask() | WiFi.gatewayIP();
  Serial.println("Subnet broadcast address: " + broadcastIP.toString());
  // Calculate the network address
  IPAddress networkIP = WiFi.subnetMask() & WiFi.gatewayIP();
  Serial.println("Network address: " + networkIP.toString());
  // The number of usable host addresses might be usefull
  unsigned long numberOfAddresses = NumberOfHosts(WiFi.subnetMask());
  Serial.print("Number of host addresses: ");
  Serial.println(numberOfAddresses);
}

// Returns the number of usable hosts in a subnet
// The network address and the broadcast address are not usable by hosts
unsigned long NumberOfHosts(IPAddress subnet){
  subnet = ~subnet;
  return subnet[3] + (subnet[2] * 256) + (subnet[1] * 65536) + (subnet[0] * 16777216) -1;
}


The first address in a subnet is called the network address. The last address is always the broadcast address. The first and last addresses cannot be used for hosts on the network.

Although I've chosen to use the gateway address in the above examples, any address on the subnet works in the binary calculations so the following produce the exact same results for the broadcast address as we did using the gateway address in the above example:


IPAddress broadcastIP = ~WiFi.subnetMask() | WiFi.localIP();


Why do I use these calculations?

The Internet Protocol (IP) was designed when every bit of processing power was precious and binary bit level calculations were and still are, quick to perform. Using the binary OR (|) in the above line of code and the binary AND (&) operator in the following line, the broadcast or network IP address result is the same regardless of which host IP address from within the subnet is used for the calculation.

In the following example using the local host IP produces the same network address as using the gateway IP did in the longer code sample above:


IPAddress networkIP = WiFi.subnetMask() & WiFi.localIP();


If you do create code that loops round all possible IP addresses be careful. A class B or worse a class A network has a lot of potential end points! Up to 16 million addresses on a Class A network.
Most home networks are class C so have a maximum of 254 addresses.

==

Download:
Network Broadcast Example (zip, Arduino C)

==

Monday, 1 May 2017

Use Pushover notification with ESP8266

Pushover.net is a notification service with clients for Android, iOS and Web.


The idea is that you can send a message to the service and it pops up on everyone's mobile phone that has subscribed to your channel on that service. There are lots of these types of services with slightly varying sets of features.


I was after one with pre-built clients for both Android and iOS that was simple to use and uncluttered with features that I would be unlikely to use. It also had to be free or low cost for home use.


I wanted it for sending messages from an ESP8266 used for a driveway alarm.


Up to 7500 messages the Pushover.net service is free to send messages, each person just has to pay a small one off fee for the client.


Creating an account and setting up the app and distribution group and a few other bits needs no explanation. I also took a moment to create a suitable icon. The thing that took all of the time was finding out how to send messages to Pushover.net from the ESP8266.

I found a few examples but none of them worked for me. There were some libraries specifically for Pushover however most were either overly complicated or poorly documented. Some of the sample code was very useful and I'd like to thank everyone who has posted other work on this subject. It all helped.

I eventually found the problem and then worked out a solution. The issue was that the Pushover service required the messages to be encrypted when sending to groups. The documentation, for using secure messages from the ESP8266, is a bit lacking.


#include "ESP8266WiFi.h"

// Push notifications
const String NOTIFICATION_APP =  "yourappkeyxxxxxxxxxxxxxxxxxxxx";
const String NOTIFICATION_USER = "youruserorgroupkeyyyyyyyyyyyyy";  // This can be a group or user

// Notification server
void PushNotification(String message) {
  // Pushover requires encrypted messages when sending to groups or anyone other
  // than the owner of the app
  WiFiClientSecure https;
  // Form the string
  String parameters = "token=" + NOTIFICATION_APP + "&user=" + NOTIFICATION_USER + "&message=" + message;
  int length = parameters.length();
  if (https.connect("api.pushover.net", 443)) {
    Serial.println("Start posting notification: " + parameters);
    https.println("POST /1/messages.json HTTP/1.1");
    https.println("Host: api.pushover.net");
    https.println("Connection: close\r\nContent-Type: application/x-www-form-urlencoded");
    https.print("Content-Length: ");
    https.print(length);
    https.println("\r\n");
    https.print(parameters);
    // ==
    // Reply from the server:
    while(https.connected()) {
      while(https.available()) {
        char ch = https.read();
        Serial.write(ch);
      }
    }
    // ==
    https.stop();
    Serial.println("Finished posting notification.");
  }
}


The above code worked for me. It needs some improvements to avoid the wait time for Pushover to respond but shows the basic principles.


I could then easily get the messages to appear on my Android phone and Shelley's iPad.

==

Download:
Code extract to use HTTPS with Pushover.net (zip)

==

Better Technique:
The above code will pause for a considerable amount of time if it cannot connect to Pushover or has to wait for the reply. It is easier to demonstrate using the above sample but is not how my code will look in the finished solution.

The reply from the server is probably only useful for debugging so the whole while loop for the reply can just be removed.

The following sample is a better way to handle the connection without holding up the code.


#include "ESP8266WiFi.h"

// Push notifications
const String NOTIFICATION_APP =  "yourappkeyxxxxxxxxxxxxxxxxxxxx";
const String NOTIFICATION_USER = "youruserorgroupkeyyyyyyyyyyyyy";  // This can be a group or user

const String MSG_ALARMTRIGGERED = "TEST ALARM TRIGGERED!";

WiFiClientSecure https;
bool isSendPush = false;
String pushParameters;

void loop() {
  TestTrigger();
  UpdatePushServer();
}

void TestTrigger(){
  if (isSendPush == false && digitalRead(TRIG_PIN) == HIGH)
  {
      StartPushNotification(MSG_ALARMTRIGGERED);
  }
}


void StartPushNotification(String message) {
  // Form the string
  pushParameters = "token=" + NOTIFICATION_APP + "&user=" + NOTIFICATION_USER + "&message=" + message;
  isSendPush = true;
  https.connect("api.pushover.net", 443);
  //Serial.println("Connect to push server");
}

// Keep track of the push server connection status without holding 
// up the code execution
void UpdatePushServer(){
    if(isSendPush == true && https.connected()) {
      int length = pushParameters.length();
      //Serial.println("Posting push notification: " + pushParameters);
      https.println("POST /1/messages.json HTTP/1.1");
      https.println("Host: api.pushover.net");
      https.println("Connection: close\r\nContent-Type: application/x-www-form-urlencoded");
      https.print("Content-Length: ");
      https.print(length);
      https.println("\r\n");
      https.print(pushParameters);

      https.stop();
      isSendPush = false;
      //Serial.println("Finished posting notification.");
    }
}


In this sample, the initial connect method [https.connect("api.pushover.net", 443);] is stand alone. It does not wait for the response.
Then during each loop, if the connection has been started [isSendPush = true;] the update method checks to see if the server has connected [https.connected()]. Only once it is connected does it send the message and stop the connection.

==

Sunday, 30 April 2017

Tips for using Visual Studio Code with a NodeMCU

I am now working on the code for my project. There are a few things to know to be able to use the Ardino libraries for a NodeMCU with Visual Studio Code as the IDE.

Here are the things I needed to know:

Serial Monitor

You need to open the serial monitor BEFORE uploading the sketch to the device.


Go to the View Command Palette (F1) menu and select:
Arduino: Open Serial Monitor

If the serial monitor is not already open, any initial serial output will not be displayed.


Once open, set the COM port and the speed. I always use 115,200 baud.

If the serial monitor is already open, the implementation of the Arduino Visual Studio Code extension that I am using, temporarily disables the serial monitor for the upload and then pops it in to view and connects immediately after uploading the sketch. This is very handy behaviour.

Keep an eye out for the monitor being closed due to errors! It just needs to be re-opened.

Uploading Sketches

This has the same behaviour as the Arduion IDE. It compiles and uploads as one function.

Go to the View Command Palette (F1) menu and select:
Arduino: Upload (Ctrl+Alt+U)


This displays the OUTPUT window for the Arduino.
When complete, if the serial monitor is already open, it will re-connect the monitor and display the serial monitor window, usually.
Where I have had errors I have found the monitor does not automatically re-open!

The Config file


If, like me, you use a NAS box for storage you might end up having to enter a library path to an IP address or host name.
If you do that, remember to double double escape '\\\\' the initial path variables in the config file:
c_cpp_properties.json

{
"configurations": [
{
  "name": "Win32",
  "includePath": [
    "C:\\Users\\you\\AppData\\Local\\Arduino15\\packages\\esp8266",
    "\\\\192.168.0.100\\users\\you\\Documents\\Arduino\\libraries"
],
  "browse": {
  "limitSymbolsToIncludedHeaders": false,
  "path": [
    "C:\\Users\\you\\AppData\\Local\\Arduino15\\packages\\esp8266",
    "\\\\192.168.0.100\\users\\you\\Documents\\Arduino\\libraries"
]}}]
}

==

I'll add to the above as I learn more.

==

Wednesday, 19 April 2017

Installing Visual Studio Code for ESP8266

Visual Studio Code is Microsoft's very light weight editor. Available for Windows, Mac and Linux.


To get it to work with the Arduino and the ESP8266 you need to add two extensions. The whole design of Visual Studio Code is so that it can easily be configured for any development language using these extensions.

Before you do that install the Arduino IDE.
Like most of the IDE's I have tried, they rely on the Arduino IDE for all the libraries.
I also made sure it was fully configured with the add-on for ESP8266 before I continued.

With that installed it's time to install the extensions.

The first extension is for C++ and it is by Microsoft:
https://marketplace.visualstudio.com/items?itemName=ms-vscode.cpptools

The other extension is for the ARduino and for this there are several choices. I've used the Microsoft one:
https://marketplace.visualstudio.com/items?itemName=vsciot-vscode.vscode-arduino

I have not tried them but here are some others for the Arduino:
https://marketplace.visualstudio.com/items?itemName=steveyin.arduino-vscode
https://github.com/fabienroyer/VisualStudioCodeArduino
https://marketplace.visualstudio.com/items?itemName=moozzyk.Arduino

They are actually very easy to install.
There is a short code you can copy in and that displays the appropriate list of extensions:
Go to file (Ctrl-P): ext install cpptools
Go to file (Ctrl-P): ext install arduino-vscode

My initial install did not go to plan. I ended up spending more time than I expected but that was down to issues with my machine setup not as a fault with the application!

Important: You must be able to run JSON files. I had problems because my firewall was blocking them for some reason! I had to bypass that.


Important: Windows 10 security, Developer Mode might be restricting installs, On my machine it was restricting me to only install store apps. I had to change mine to Developer mode to get the extensions to install.

Extensions appear in a side bar. Select the appropriate one and press install.


Once installed, either restart or simply press the reload button that appears. Only then do the extensions get downloaded and installed.


Now it should be ready to go.

All projects need to be in their own folder. You can open individual files but without a corresponding folder there is nowhere for the application to save it's settings.

Once you have a new .ino file or project open, the status bar displays Arduino specific content.


There is a tiny selection at the bottom on the status bar to select C++ and the board etc.
You can change the settings and more from the Command Palette menu that appears when pressing F1.

At this point Intellisense worked up to a point. Where the classes are internal to the code, it worked fine but it could not find the external libraries and dependencies.

To get the rest of the Intellisense and probably the ability to compile you MUST select the board AND the COM port on the status bar. That appears to be the trigger to read the appropriate libraries.


This can be a pain if you do not have the Arduino or ESP8266 connected to the PC because you might not have any COM ports. Also, try selecting the COM port first. That's what I did.

That got things working for the main Arduino classes but I was still missing the ESP8266 classes.

That appears to be caused by a slight error in the install. It automatically includes a path that is too specific.

It can be fixed by following the light bulb link from within the code file.


That opened the file c_cpp.properties.json file.


I moved the path lower down the tree, to this:
"C:\\Users\\jcb\\AppData\\Local\\Arduino15\\packages\\esp8266\\hardware\\esp8266\\2.3.0"

The application searches all sub-folders unless you tell it otherwise, so that picked up all the class files needed.

I also included all the Ardunio libraries:
"C:\\Program Files (x86)\\Arduino\\libraries"

It is necessary to restart Visual Studio Code for the change to take effect.


Once that was all working nicely it was time for a compile and upload.

That option can be found from the F1 Command Palette list. Not the most convenient place but it's OK.

It didn't work first time because I had trouble with using a USB hub. I had to swap to a physical USB port directly on the machine but after that it worked at 115,200 baud.


Not an extensive test so far but it's working. I like the Intellisense in Visual Studio Code and the style of the app. I'll try this for longer to see if it makes coding that much easier.

==

Update: 20 May 2017
The latest updates stopped Intellisence working with my Arduino code!
Versions: Visual Studio Code 1.12.2 with the extensions, Microsoft C++ 0.11.1 and Microsoft Arduino 0.2.2


Something has messed up the Intellisense engine. The code would still compile but there were lots of red squiggles under code that was clearly valid.


I managed to find a setting which changed the Intellisense behaviour and put it right! You have to open the File -Preferences -Settings and browse down to the C++ configuration section.
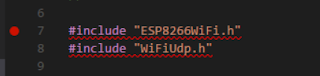

With the 'Default' engine the code looks wrong


With the alternate 'Tag Parser' the code looks right
More details about the Intellisense engines and setting for C/C++ can be found here:
https://github.com/Microsoft/vscode-cpptools/blob/master/Documentation/LanguageServer/FAQ.md

The issue has been reported on both the VSCode and the C/C++ extension GitHub sites:
https://github.com/Microsoft/vscode/issues/27006
https://github.com/Microsoft/vscode-cpptools/issues/743

==

Adding the NodeMCU and other ESP8266 boards

I don't remember having to do this but I probably did at some point. Add additional boards from the Arduino Board Manager.


Access this from the Command Palette from the View Menu.


Install the boards you require.

==