Search This Blog

Showing posts with label Heated Seats. Show all posts

Thursday, 3 March 2022

Defender 300TDi heated seats

This is the second time I've added heated seats to Fender. This time I've done what I think is a tidier job.

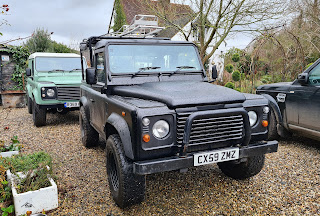
Fender is a 1998, 300TDi, so there was no factory fit heated seats option. As usual, I've had to work out my own wiring. There is a convenient feed for air conditioning, which I've used for the heated seats.

It's not very many week ago that I fitted the heated seat wiring to our TDCi Defender, Thunder Truck


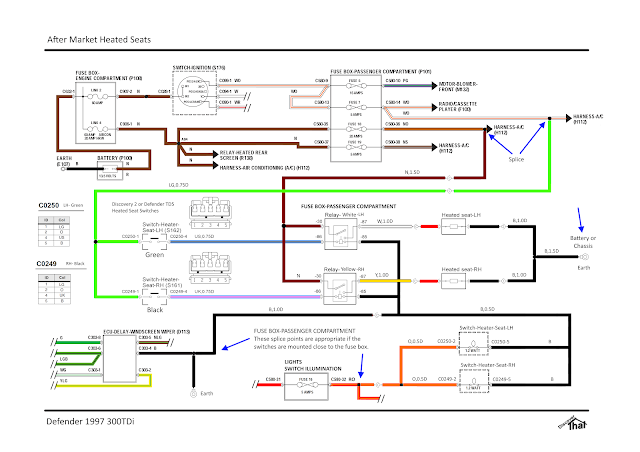
As then, I've fitted relays. Land Rover wire their heated seats directly via the switches. I am unsure of the rating of the switches and the after-market heated seat pads do not state what current each circuit requires. All I know for sure is that they are fitted with a 20A fuse, so it is safe to assume each seat uses no more than 10A. I've used that to size all the wire gauges.
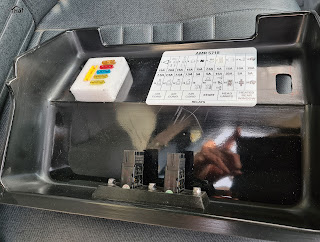

I'm using an extended fuse box cover. I bought it so I had enough space for the extra relays without struggling but it was also the ideal place to mount the heated seat switches.


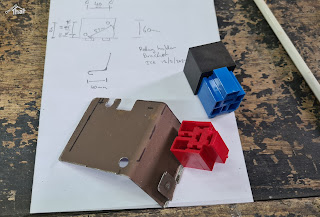
I made a bracket to mount the relays under the existing fuses.


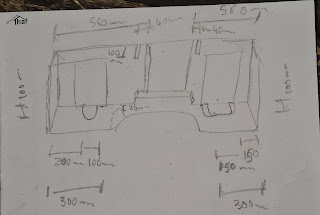
Measuring where to cut the rubber mat

Before fitting the new Exmoor Trim seats I fitted the under seat rubber mat. Another Exmoor Trim product.


I've used some 1/2" (12.7mm) spacers to stop the seat rails catching on the thick rubber mats. The mats are so thick, I've found, that it needs at least 12mm spacers for the seat to move freely.


I needed longer seat bolts, so I bought some stainless steel M8x40mm torx pan head bolts which do the job nicely. I've done the same in both Defenders.


With the mats and the seats in, I threaded the cables before fitting the carpet and cubby box.


I've used Discovery 2 (D2) heated seat switches because, at the time I was looking, I could not get Defender TD5 or TDCi switches. The D2 switches are the same as the Defender switches, they just have different style caps. I've wired them so that the tell-tale lamps and the backlights work.


Tested and working well. Nice and warm.

==


Monday, 4 October 2021

Defender Puma heated seat electrics

We already had the Exmore Trim heated seat elements in the seats in Shelley's car. I wanted to wire them in using the original Land Rover switches.


It was easy to find a set of switches on ebay with the connectors. I'm not keen on them being pre-wired but that's how they came. Land Rover's standard wiring has the heating element controlled directly by the switch. I was unable to find out the current limit of the switches, nor the current draw of the Exmore Trim heating elements. All I know is that they use a 20A fuse for the pair.

It is safe to assumed, that the seats draw less than 10A per seat. I didn't want to take any chances with the Land Rover switches, so I have run them to relays.

The above is the updated circuit diagram with the heated seat switches connected via fuse 33. I also ran cables ready for a Sub-Woofer. The positive feed is shown in the above diagram, connected via fuse 32.


I was able to buy the contact pins that fit the standard Land Rover fuse boards, so I was able to use two of the spare ways in the under dash fusebox, to fit the fuse for the heated seat switch feed and another for the sub-woofer power. Both are switched from, what is called, the Window relay. That relay feeding various things, like electric windows and heated seats, when fitted, plus the windscreen wipers.

It's a bit tricky to access the fusebox because, although it can be unbolted, it does not fit through the opening in the dash. I managed to do what I needed.

I had a bit of luck with the feed for the power to the seats. There is an unused fuse in the under seat fusebox. Fuse 4. I happened to have the right spade connected to add in to the plug in that fusebox to connect to Fuse 4 and that fuse is marked as 20A. Perfect for my needs.


I ran a wire from the under bonnet ground stud to an unused stud under the seat. That probably wasn't necessary but with a definite negative connection to the under seat point, I was confident using that for all the negative connections.


I made up some harnesses and threaded them out in to the engine bay and under the car to the UK drivers side seat box. In that box are the two relays. They are attached to the relay brackets handily provided by Land Rover. From there another cable runs to the UK passenger side seat box.


It's just a job of terminating all the wires and plugging them together.

==


Sunday, 5 February 2017

Heated seats loom

I've wired up the heated seats with the usual assistance from the cats. We added the heating pads when we re-trimmed the seats a few weeks ago.


To join the looms I have used 2 and 4 way 6.3mm connectors.


The panel for the switches is held in place using the screws that secure the cubby box. The making of this panel is detailed in an earlier post.


The additional relay socket is used as the connector for the loom in the fuse box. There is just enough space. I used two wires from the unused Air Conditioning harness connector (C786 in a 1997, 300TDi, harness H112). One of those is for the ignition trigger for the relay (White_Orange) and the other (browN_Orange) for a 20Amp feed for the heated seat harness. That wire is conveniently already fused.

I up-rated the fused link (4) under the bonnet from 20Amp to 50Amp. If Air Con is fitted that link is 60Amp, so this is a safe change.

In the fuse box

Under the cubby box

Two cables need to run between the fuse box and the cubby box where they join the heated seat harness. The cables go under the rubber matting of the transmission tunnel.

I ended up using three wires because I didn't have any 20Amp cable of a suitable colour so I used 2x10Amp orange cables plus a black for the ground for the relay. An advantage of the 10Amp cable is that it is noticeably thinner so lays better under the rubber matting.


The ground connection comes from new wires I had already run from the chassis. See my previous post about that.


Unfortunately the only relay I had was the wrong type so I can't try the heating out properly yet. When installed it will operate when the ignition is on.


While removing the drinks holders from the cubby box, the sticky Velcro strips came away from the MDF base. It came as no surprise that the Velcro bond was stronger than the glue.


I replaced the Velcro with a, much more reliable, screw.

==

Update: 8 Feb. 2017
The relay arrived yesterday and fitted last night. Shelley and I sat in the car with the engine running. The seats warmed up very nicely.
Another successful job completed.

==

Links:
Relay guide from 12 Volt Planet
Various guides for car wiring from Polevolt