Search This Blog

Thursday 22 June 2017

My C++ reminders

I don't spend all my time doing the same thing. I hop from one project to another and end up using different tools and different languages as appropriate for the job. It becomes difficult to remember the best practice for any particular tool. I need to maintain a quick reference sheet.

Coding Standards For C++

Use variables instead of hard coded 'magic number' to make code more readable.
Use const variables instead of #define for static members because the variable name is visible in the debugger.

I prefer all my configurable options at the start of the file.
I use #define where I do not want a variable to have global scope but I want all the configurable items in that block of code at the start of the file.

Do not use #define within a function unless it cannot be avoided. An example where it might not be avoidable is where extra code may be needed only for debug purposes or where code is specific to only one environment.

I put all my comments in the header (.h) file including the licence details and feature list.

Preferred Naming Convention

These are my preferences.
UPPER_CASE for global scope const members or #define macros.
camelCase starting with a lowercase word for variables.
CamelCase starting with uppercase for function or method names (less common style.)
No differences for public, private or protected members.

Licenses

I release most of my code under an MIT, Microsoft Permissive or similar style licence unless, any of the work it is based on, forces another licence. I try to avoid referencing works released under the GNU public licences (GPL) because I think they are too restrictive. The Lesser GPL is just about acceptable.

**

Licence (MIT licence):

Permission is hereby granted, free of charge, to any person obtaining a copy of this software and associated documentation files (the "Software"), to deal in the Software without restriction, including without limitation the rights to use, copy, modify, merge, publish, distribute, sub-license, and/or sell copies of the Software, and to permit persons to whom the Software is furnished to do so, subject to the following conditions:

The above copyright notice and this permission notice shall be included in all copies or substantial portions of the Software.

THE SOFTWARE IS PROVIDED "AS IS", WITHOUT WARRANTY OF ANY KIND, EXPRESS OR IMPLIED, INCLUDING BUT NOT LIMITED TO THE WARRANTIES OF MERCHANTABILITY, FITNESS FOR A PARTICULAR PURPOSE AND NON-INFRINGEMENT. IN NO EVENT SHALL THE AUTHORS OR COPYRIGHT HOLDERS BE LIABLE FOR ANY CLAIM, DAMAGES OR OTHER LIABILITY, WHETHER IN AN ACTION OF CONTRACT, TORT OR OTHERWISE, ARISING FROM, OUT OF OR IN CONNECTION WITH THE SOFTWARE OR THE USE OR OTHER DEALINGS IN THE SOFTWARE.

**

Where appropriate I use a single line version which I believe has the same meaning:
'This work is free to use with no warranty'

==

References:
http://www.cplusplus.com/
http://www.learncpp.com/

==

Sunday 18 June 2017

Fixing an ABS sensor warning

Yet again the dashboard warning lights were on that are comically referred to as the 'three amigos.'

There was also a forth general brake warning light on. The three amber 'amigo' lights, traction control, ride height and ABS, only indicate something wrong with the ABS system but not exactly where the fault is.


The trusty Nanocom to the rescue again. It pointed clearly to the rear left sensor.


Looking under the car it was a very easy diagnosis. The sensor cable had been rubbing against the wheel rim and worn through the cables!

I had a quick look on the Internet about how to replaced the sensor but according to a workshop service release from Land Rover in 2001, the sensor is deliberately supplied pre-installed in the hub because workshops are not usually clean enough to fit the sensor without getting grub inside which would affect the operation!

The sensors are therefore usually only available with a hub.

I will eventually have the hub replaced but for the time being I have done a pretty robust repair of the broken wires.


With the wheel off it was very easy to access the wire.


I've trimmed back the insulation and joined the wires. I made a splint out of a small spade connector. I could have soldered them but I am very reluctant to solder any wires on a vehicle.


I was taught that solder stops the strands in wires from flexing so the cable has a tendency to break at the margin between the solder and the free strands. As I've seen this myself, many times, I have no doubt.

I invariably use a crimp joint unless it is really not practical.


I wrapped the joint in several layers of insulation tape, followed by a layer of duct tape over the whole exposed length and then as further protection I've used spiral wrap over the top of that.


Once the car was back on the ground I checked which way the brake pipe and wire flexed. I've had to deliberately move it so it curves away from the wheel. I'll probably have to monitor it.

The test drive went well with everything working as it should and no warnings.

Saturday 17 June 2017

Fixing Bob's belt

Bob is our Hayter ride on mower. I think it's model RS102 or something like that.


After well over 10 years of use, the cutter belt had worn through.


There's a little bit of plastic to remove to get to everything.


I had to work out the path of the belt because the parts manual drawing was not correct.


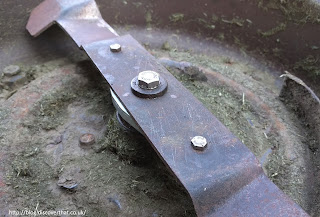
I had a set of old blades taken off at a previous service. I ground down the old blades and used a screw driver in a vice to make sure each was balanced.


Taking the deck off is fairly easy. The rods pull out the side but the plastic grass hopper tube needs to be unclipped.


The old blades were very worn. Over an inch short at one end!


I needed to order a few spare parts.


I ordered a new set of blades but I'm going to use my older set first.


I put in new bolts because the old ones had been worn. The corners were all rounded.


To get the cutter deck back on, with the belt in place, I held back the spring pulley with a cable tie.


To get the rear back in, I had to lower the cutter blades to the lowest point.


The plastic tube got in the way of putting it all back together so I had to temporarily remove it. It's only two bolts and the whole tube pulls out the back.


All back together.


Shelley went straight out to try it out.


==