Search This Blog

Showing posts with label Vacuum Forming. Show all posts

Sunday, 24 January 2016

3D Print Finishing with Resin

I've been struggling for some time with the finish of 3D prints. The layers used to create 3D printed models results in uneven unsatisfactory surfaces.

I've tried to sand down the peaks and I've tried using high build primer followed by sanding and I have not been able to get a good smooth finish. It needs so much sanding that any detail is lost!

I think I now have a solution. I can't claim it was entirely my own idea. I've been searching the Internet. One of the most promising sounding was what follows.

I've used a thin layer of two part epoxy resin painted on and sanded down.
There are several resin products mentioned in other Internet tutorials, some are specifically for the purpose however I struggled to find some of them in the UK at acceptable prices.

I settled on Z-poxy PT-39. I was able to get this from Amazon. It is advertised as an adhesive but it was easy to mix and paint on a thin layer. I cleaned the brush after using Isopropyl Alcohol.


The PT-39 epoxy resin claims to dry in 30 minutes and probably does, however I left it for 24 hours before sanding it smooth.  It was very easy to sand getting a smooth feeling surface without much effort.


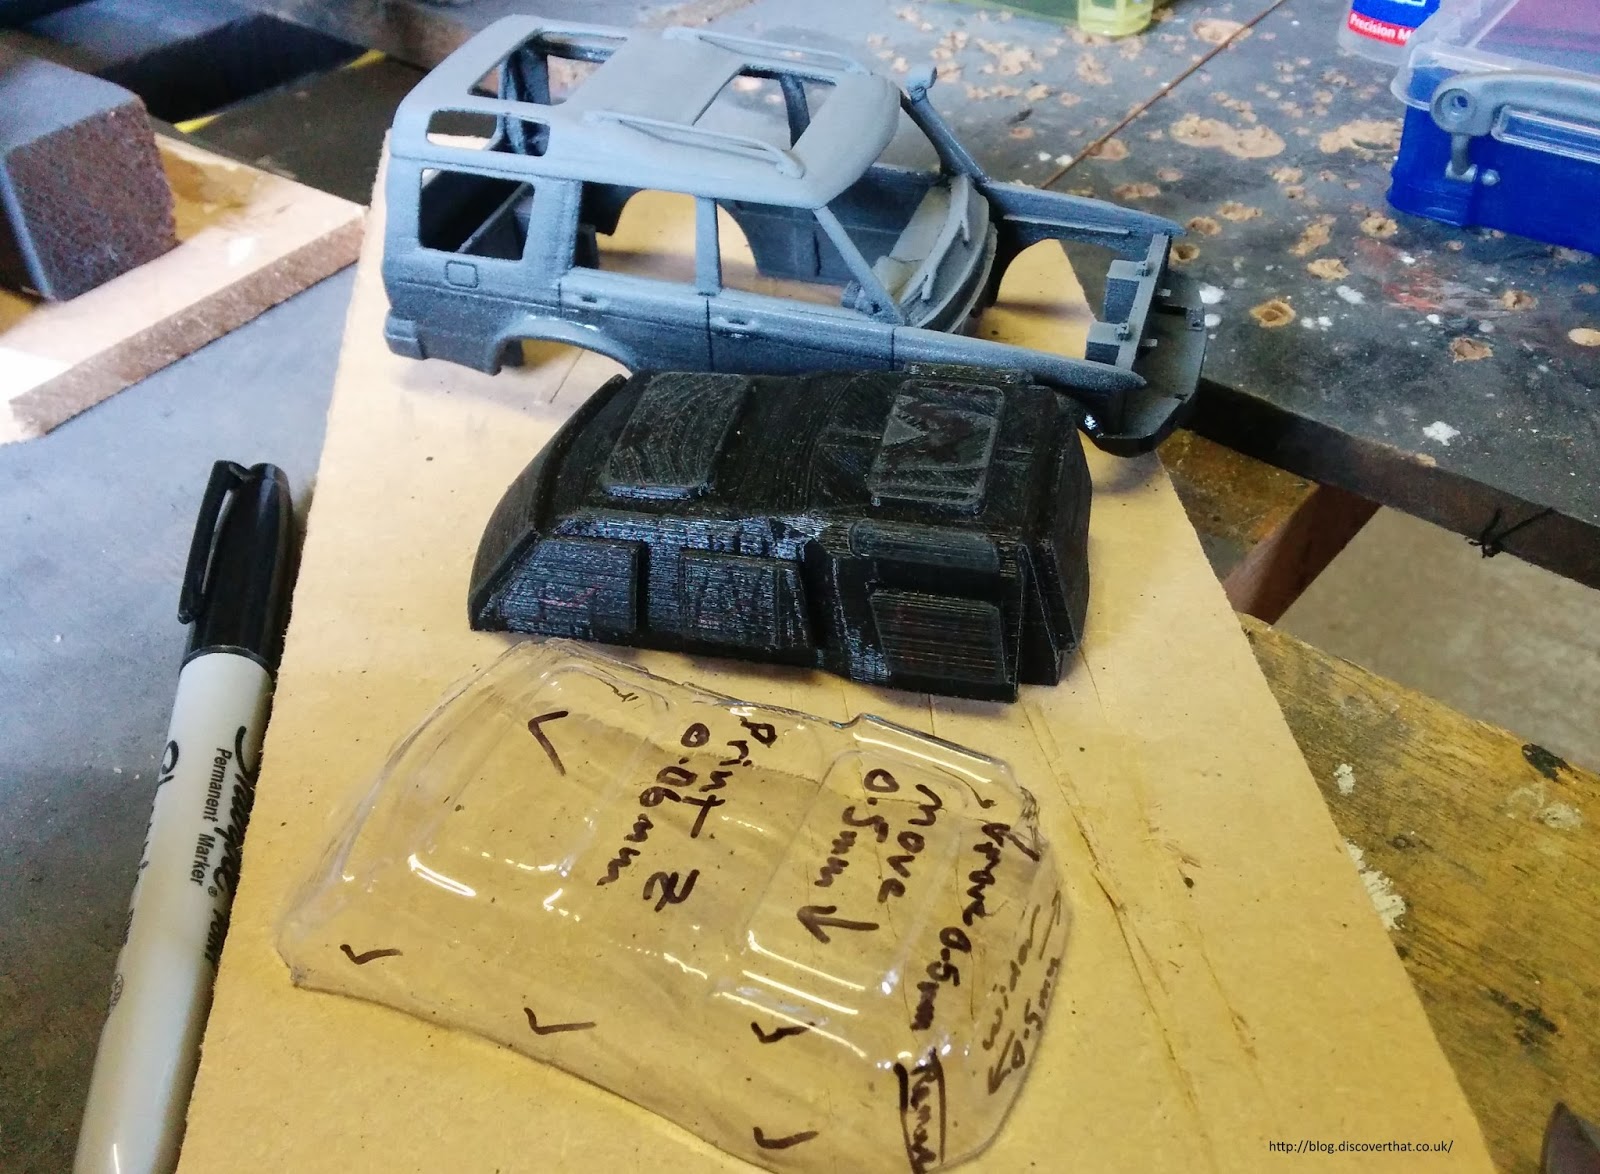
At the moment I have used it on the mold for the vac formed windows for the slot car Land Rover Discovery that I am making. For the mold, I used a cheap brush to coat the plastic layers with as thin coat of mixed resin as I could manage. I only did one coat on the mold. If I was finishing off body panels I might paint on a second layer to fill slight uneven areas and then re-sand but for the current purpose the one layer sanded down a lot, was sufficient.


The end result is better than I was expecting. It is hard to show in a photo but the resin felt smooth to the touch. The surfaces of the resulting vacuum formed plastic windows are now evenly clear.


On the subject of vac forming I have tried 0.5mm PETG and 1mm PETG clear plastic. Much to my surprise both thicknesses worked well. I was expecting the 1mm to be too thick for my heating ring but it was fine and the end result of the 1mm, as could be expected, was a bit stronger especially in the corners.

From these results I think 0.75mm clear PETG would be the most effective on my machine.


It is necessary to let the 1mm A4 sheet heat up so it droops down at least 20mm and then move it over to the vacuum former, just before it get too soft and touches the ring! I find having the vacuum on before putting the plastic over the mold works best.


You can see in the photo the difference between the surfaces where resin has been applied and where it has not. It was difficult cutting the plastic off the mold because of the tight overhangs but I am pleased with the end result. I intend to glue in each window in the vehicle separately.

Monday, 31 August 2015

Vacuum form windows

I used my home made vacuum forming setup yesterday to create the first draft of the windows for my Land Rover Discovery model.


The use of the kitchen oven and the remnants of the plastic smell afterwards had not go down well after I first tested my vacuum forming machines so before I did any more I spent just under £11 on a single ring electric hob. This is my first use of that hob. It's only 1500W but is more than hot enough to melt the plastic for vacuum forming.


I am much happier with the whole process being in the shed.

I didn't quite heat the plastic up for long enough yesterday but it was sufficient to get most of the mould covered. In future I think it needs to have drooped by at least 15mm before taking off the heat.


Trimmed up, I fitted it to check alignment. The front windows all fitted perfectly but towards the rear they are a fraction out.


I marked up the changes needed and adjusted the 3D model. I have increased the resolution to the best for my printer which is down to a Z height of only 0.06mm however that means the mould will take 12 hours to print.


I also vacuum formed the head lamps glass and I've offered them up. With a bit of trimming they fit as intended.


In both cases the lines from the 3D print were visible in the finished components so I am going to sand down the next moulds to have a better finish.


Talking of sanding down. I've probably done as much as I can without too much detail being lost so now the body just needs a final top coat of paint.

Monday, 15 June 2015

Vacuum forming machine

Between other jobs, over the last few weeks, I have been putting together a vacuum forming machine.


When looking at 3D printers I noticed that they cannot do proper transparent areas because they extrude in layers. The vacuum forming machine is to create windows.


I used one at college over 30 years ago, that one was made from a timber frame, some board and an industrial vacuum cleaner. I wanted something smaller so I knew it was fairly easy to make one from bits in my shed and the Internet confirmed that a normal home vacuum cleaner had enough power. All I needed was a box with holes in, some frames to hold the plastic and a heat source.


The design and photos show it all.  Instead of glue I used silicone sealant and screws to hold the joints of the box together. The better the seal the more the suction works where you want it.


By luck I had a 32mm cutter which is the exact size of the vacuum hose end.


In practice the vacuum pulls the hose end in to the hole to make a better seal so I did not need any gasket or other cover for the hose hole. There was plenty of suck to pull down the plastic. The grid of holes in the top of the box are all 4mm diameter in rows and columns 10mm apart and staggered.


I tried to use an old sandwich maker as the heat source but that didn't get hot enough so I resorted to the kitchen oven which I had already identified as suitable.  It was but I had to pay attention. Once the grill was hot it only took a minute for the plastic to droop and a few more seconds for it to run all over the oven shelf! I'll use a lower setting next time.

The grill in our oven only works when the door is closed so I had to remove the handles I had added to the frames to get the frame to fit. I had a very simple bent wire support from a disposable BBQ that was the ideal height to raise the frames, holding the plastic sheet, above the oven shelf.


By experimentation I established that the optimum time to take the plastic out of the oven was as the droop was about half an inch down. I must get round to cleaning the glass on the oven door to make it easier to see that stage.


My first experiments confirmed that the machine worked however my choice of mold was too ambitious. I could not get rid of the webbing on the tall section and the plastic, pulled in to the lowest thin slots, was too thin. That was disappointing but it confirmed in my mind that simpler, lower shapes would work.

Having the vacuum already on before putting the plastic on the mold worked best for me.