Updated: May 2025
I often see posts, on various forums, about what free software to use. Many commercial products offer a free version for home use or a limited feature version. One way or another, I usually end up moving away from those restricted versions.
The only perpetually zero cost software, tends to be Open Source. Although there are many open source applications that show up when searching, lots of those do not get the commitment to be of any use. However, just a few become fully functional products that often rival their commercial counterparts. On the flip side, sometimes there are no reliable Open Source solutions available.
The following is a list of the software that I have found are sufficiently developed to be usable products, at least for my home use and a few comments on alternatives:
Photo Editing = GIMP (GNU Image Manipulation Program) but I'm using Krita and Paint.net
This is the niche that Photoshop fills in the commercial world. GIMP is a very capable photo editor and has a massive community of support and development. It has a lot of filters supplied with it and a lot of available add-ins. Feature and reliability wise its a great tool but its disadvantage is that it takes ages to open, in my opinion.
Because I usually only do basic tasks to images but I do them often, I prefer a programme that loads faster.
Paint.net is a good photo editor for day to day use. I prefer the simplicity and speed of Paint.net. It's getting a bit tired but for all basic tasks it's a quick and easy tool. The thing I don't like is finding the legitimate download, past the vast number of adverts, on the web site.
Krita is still new to me, in May 2025, but so far, the features I've needed to use have been easy to find. Some of the options for the features are a little hidden but it just takes a moment to understand the interface. It has lots of brushes and a good selection of filters. It takes a long time to open the first time it runs but after that the start-up time is acceptable. It even worked with the pressure sensitive pen that came with my laptop.
Vector Graphics = Inkscape
This is the category that Adobe Illustrator fills. Inkscape is usable and has most, if not all, of the essential features. I would not claim it is a match for, or even close to, Illustrator but for free, Inkscape does an acceptable job and is still being developed. Inkscape is one of the few tools to save SVG format files.
I have not found an alternative, Open Source, vector graphics editor. To mention an alternative, which I have not used it myself, I hear that Affinity is a budget friendly and good tool. It's been recommended to me for a number of uses. Designer is their vector graphics editing tool, but there are other applications in their suite, such as a desktop publishing tool.
2D CAD = QCAD Community Edition and LibraCAD
I have more experience with QCAD than LibreCAD. Both have a very similar appearance because LibreCAD is a fork of QCAD. These are both applications that an architect would use for plans and an engineer would use to produce drawings to have parts manufactured. They are in the same line as the industry standard AutoCAD.
I used QCAD extensively, from November 2022 to about December 2024, to produce building plans. The QCAD Professional version is paid for, although very low cost. It add lots of nice to have, but not essential, features. I was going to try to stick to the Community Edition but I wanted the layouts and viewport features, so I paid for the Professional version. For a short time I used just the completely free QCAD Community Edition, it worked very well and had all the important features of LibreCAD 2.1.3.
I tried LibreCAD 2.1.3, but it crashed frequently, so I abandoned that. A newer version of LibreCAD 2.2.0rc4 was unsigned code, so a security risk that I did not have time to attempt to mitigate.
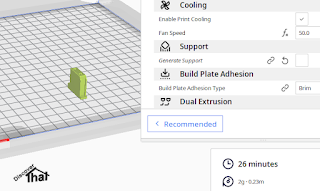
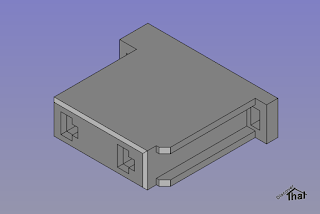
3D CAD = FreeCAD
This is a solid body, parametric editing solution. There are many commercial products in this area, such as Fusion 360 and Solidworks.
I like FreeCAD. It has a few limitations in the way the user interface works and the occasional bug but I have been able to easily produce any model I have needed for 3D printing. Version 1.0 in 2025 has made it an even more usable tool.
I came across an alternative solid body modelling app. BRL-CAD. I have not tried it out yet. It looks like it is focused on modelling and rendering scenes. As compared to FreeCAD, which is aimed more towards engineering and CAM.
3D Mesh Modelling and animation = Blender
The investment in Blender has been so intensive and it's been around such a long time, that it now rivals the commercial products. It competes with Maya and 3DS Max and other industry standard products.
If you want to create models for computer games or for use in an animated movie, Blender is the product. Blender can also be used to make the movie, and often is!
Like most mesh modelling products, it can be difficult to learn. All the recent releases I have tried have been stable. I've been using Blender for many years, on and off, and as of April 2025, I'm regularly using version 4.4.
Maps = QGIS
This may be a niche area of interest but QGIS has everything needed to produce very nice custom maps. It can import the standard mapping data, such as ESRI® shapefiles, which are available to purchase, or often to download for free. It took me a little while to understand the mapping terminology, but the application is fully featured.
I have no idea what a commercial alternative would be.
Office Suite = LibreOffice
This is the category dominated by Microsoft Office. It includes; word processor, spreadsheet, drawing and presentation packages. There are a number of free alternatives, such as Apache OpenOffice. Apparently LibreOffice has more features and more recent development and has better file compatibility. I have Microsoft Office 365, so I only tend to install and use alternatives on friends computers, so my experience is limited.
Video Player = VLC
This is my go to video player when the codec used for a video file is not one of those shipped with Windows. Install and play. Job done.
Conclusion
That's my list for now, I'll continue to come back and update this as I find and use more of these types of applications.
==
Updates
This page is updated, as I gain more experience with applications. The comments and versions may not relate to the date of the original publication.
==