Search This Blog

Sunday 22 February 2015

Shoe Rack

Shelley mentioned that she wanted a shoe rack for inside her wardrobe, so while I was in the shed I made this one out of timber and board I had knocking about.


Shelley took this arrival as an opportunity to tidy up.

Sunday 15 February 2015

Paint Experiments for Scalextric Plastic

Following my struggles with painting MDF I thought it was worth testing before I try to paint the Scalextric track borders.

I will want some grey and some black depending where on the circuit they are placed.


I tried house paint that I had in my shed.  This is exterior water based paint.

I cleaned the plastic with a tiny bit of detergent in water. When dry I applied the paint with no other preparation.

It did not go on very well and I did not have high hopes.


I prepared the other end for car spray paint.  I used Adhesion Aid first.

After a few hours I added the primer.

The following day I added the top coat.

Using very simple test techniques, my finger nail, I scratched off the paint.

There are three areas, The house paint, car spray paint with no Adhesion Aid and car spray paint, with Adhesion aid.

The results are as expected.  The car spray paint with Adhesion Aid is slightly harder to scratch off than the car paint with just primer. All three can be scratched off with a bit of effort.


The surprise is the house paint. On the smooth areas it is very easy to scrape off but on the rough top surface it takes enough effort that car tyres would not be enough.

Conclusion:
All three paint areas would survive slot car tyres. None will survive a sharp object but the car spray paint needs more effort to remove.
Car spray paint can be ready within hours. House paint needs to be left for at least a day to dry per coat and will need at least two coats.

==

Update:  Once the paint was fully dry neither was flexible and both came off in sheets if the plastic was flexed.

Power Switch

While I had my saw out I put together a power block that I could attach to the slot car layout to turn everything on and off at the same time.


The advanced power base uses two power supplies which I wanted to keep tidy and I expect I'll add additional things in the future.

All made out of leftovers and spares from my shed.

Car Display Case

The little plastic cases that slot cars come in are nice and do look good on a shelf but they are a bit fiddly to open every time you want to drive a car.

I looked round for shelves suitable to store the cars in an easy to get at way.  There are plenty to choose from, some are expensive, some are not to my taste but none quite fitted what I wanted and where I had available to put it.


As usual I made my own.


I had plenty of MDF off-cuts from making the track and so that is what I made the shelves from. The construction was easy but I had a few problems with paint.  I have used MDF for years but I have never painted it before.  I thought I would just be able to spray it with car paint.  I now know this is not a good idea.


After the first layer of top coat went on and dried very watery and blotchy looking, I did some research.  Too late to go back I had to sand down and I used water based house paint which was my best hope for recovery.  It worked but took a lot of layers to cover.


The end result is OK but I would use a specialised MDF sealer first, if I was doing it again.


Tuesday 10 February 2015

Respray the Mustang - Part 2

The Mustang is back together and is completely transformed from the race livery to a normal road going car.


The clear lacquer is dry and I am pleased to say it is clear.  Always a worry when the spray starts off as a milky colour before it dries to clear.


I use superglue to keep it together.  This holds well but it takes a lot of care to avoid messing up the paintwork. I use a pin to distribute a tiny bit of the adhesive where needed.


I am pleased with the results as is Shelley.


I ran it round the track after assembly and took some photos.  A black car on a black background, late at night with poor lighting is a bit difficult to photograph well, so I'll take some more in daylight when I get a chance.


Sunday 8 February 2015

Slot.it Ford GT40 MK1

I wanted a car from the year I was born and I like the Ford GT40. There are quite a few choices, most are MK2's which were produced from 1966, a year too new.  The MK1 was produced from 1964 to 1965 and continued to be raced after that.  The Slot.it version is based on the livery from 1966 but I have found photos of it from the 1965 season as well.  Close enough for me.


The Slot.it car has a lot of detail. The plastic is very thin and the whole car weighs nothing. It feels a lot more fragile than the other makes of car I have but so far that is not a problem.

While I was waiting for paint to dry I fitted the digital circuit to the car.


I had selected the Slot.it chip, expecting it to be easier to fit to the car.

Although it is a neat shape to fit round the bolt hole and between the edges of the motor holder, it was no easier to fit than the Scalextric version. The cables are only just long enough.  Because the leads are so short, the board moves when the car corners so the IR LED does not line up with the hole the instructions tell you to drill. In addition the socket on the chip is too tall to fit under the driver.


I needed to turn the hole for the IR LED in to a long slot and cut a hole under the molded driver. That was very fiddly and took ages.


To top it off I had to re-solder the connections to the motor because the ferrite bead would not fit between the motor and the body, so I had to position it in the rear wing!


The good news, once it was all together it drives nicely and looks good.


Respray the Mustang - Part 1

Shelley's dream car would be a 1968 Ford Mustang Fastback.  Of course it would also have to be black.  Well we don't have a real one.  The nearest I can manage is a slot car.


I bought two Mustangs produced by Pioneer Slot Cars with the intention of painting one black. The only ones available were racing styled, all the road going 1968 Mustang slot cars are limited edition and no longer available.  One of the racing ones is mainly white and the other mainly blue.


This post is part one because at the moment I have only got as far as painting the body.  I am currently waiting for the top coat lacquer to dry before I can reassemble it.


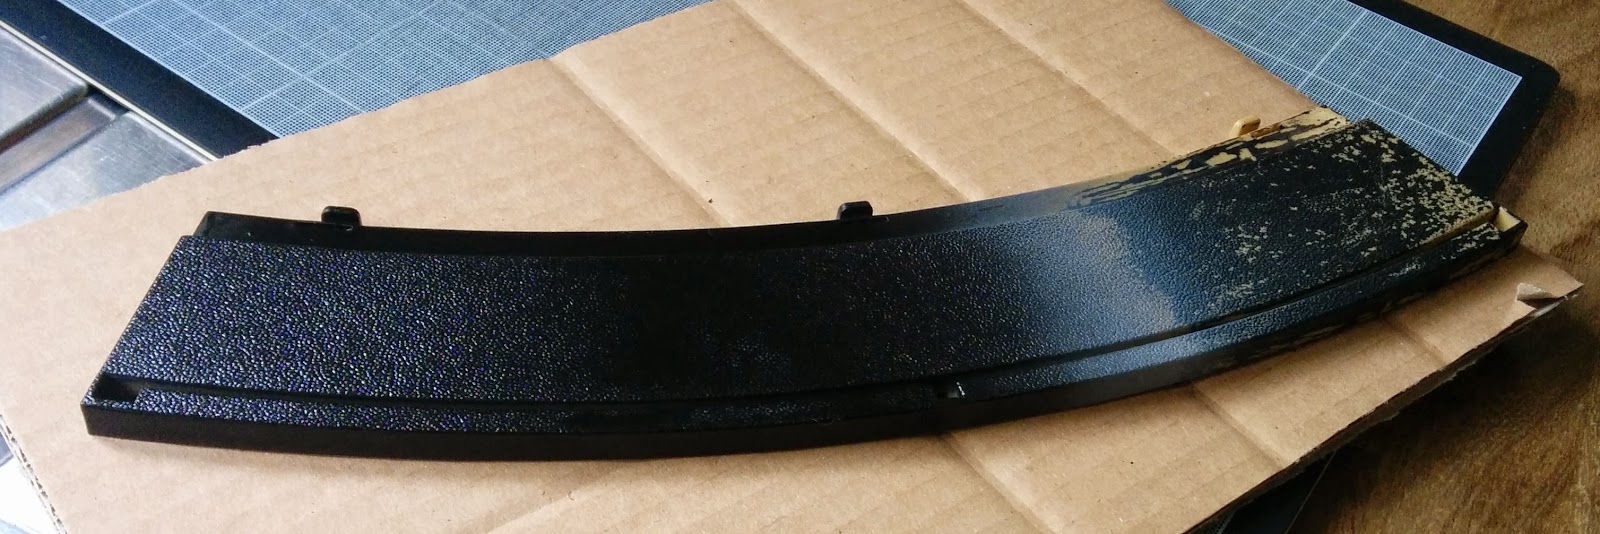
I selected the darker of the two bodies in the hope the over paint would cover better.


The Pioneer models are very well put together.  I initially thought I might have trouble taking it apart and was prepared to mask it but with a bit of fine scraping with a sharp knife and gentle levering with a screwdriver, it popped apart neatly.

I'm glad it came apart because the masking would have been very tricky.


I am making a road car out of a racer.  The racer is missing a front bumper but I found a Scalextric spare part from a 1970 Mustang that is close enough.


I drilled some mounting holes ready to accept the bumper.


I tried several methods to remove the transfers but nothing worked. I have my doubts if they are transfers and are perhaps some form of paint application.  Final solution was very gently with wet 600 grit paper.


After that I washed it with a drop of detergent then thoroughly dried it.


I attached it to a stand with the other parts that needed paint.


Sprayed with a thin coat of primer and then I had to wait for it to dry. That is the trouble with painting.

For anyone paying attention to the photos, I did not spray the car in our kitchen. As it is winter I kept the car and the paint in doors to keep them warm. I took them out to the shed to spray and brought them back to dry.


A few hours later I did the same with the black paint. I did just two coats because I am worried about the paint getting too think and flattening out the details.

Again, waiting.


Now to add back the painted details.  Luckily there is not much to add but they are tiny features.

I used to paint small models and prefer acrylic paint. My paints had not been touched in 20 years so I bought some new paint. Much to my surprise some of my old paints were still OK.


There is no trick to painting the details, as far as I know. It just needs a steady hand and continually retouch until the lines are just right.


More waiting, and then a final top coat of car wheel lacquer. That's where I am now... waiting for paint to dry.

==

Edit: This morning I checked and the lacquer has dried clear, so I can relax.


Sunday 1 February 2015

Hill Climb Road Works

This Scalextric track may be an obsession.


The previous version of the circuit had a slight flaw. Where the initial hill climb was on a curve it caused a cross axle situation and slow moving cars would stop or pause when the braid lifted off the conductors.


I've made a small adjustment to the layout to have the slope changes only on straight sections and made the initial hill climb cover a longer distance so the rise is shallower.


Did I mention obsession. I've also bought the Advanced Powerbase. This was partly because I was struggling to come up with a position for the Digital lap counter which was far enough away from a corner to register properly and partly because I discovered you could run Ghost cars.


Having the Advanced Powerbase made the track design easier because there was only one section to fit in the start straight. I used a telephone RJ11 extension lead to put the display in an easier to read position.


I've added a few last details and I think the track is now finished. Everything works as it should and I can have some fun driving it... if the cats let me!