Search This Blog

Showing posts with label Wheels. Show all posts

Saturday, 17 September 2022

Service a Shimano Deore wheel hub

I think it is a Shimano M6010 or earlier version of a similar hub. It's definitely a Shimano Deore 142x12 mountain bike hub.

It had more play than I was happy with so needed a service.


I am pleased to say it is similar to other Shimano hubs that I have taken apart.

The locknuts undo with two 17mm cone spanners from the non-drive side. That releases the axle which can be drawn through, being careful to catch any ball bearings that drop out.

I rest the wheel over a plastic tub, so anything that falls out, goes in the container.


There is a dust seal at each end. Note that they have a slight lip that fits upwards into a recess in the back of a flange running round each bearing cone. The dust seals are easy enough to hook out with a screw driver, or pick. That reveals the bearings.


The non-drive side bearings are held in a retainer ring, so they all come out in one go.

Flipping the wheel up the other way, the dust cap can easily be removed and I used a magnet to remove the individual drive side ball bearings.


The next stage is simply to clean everything up thoroughly and inspect. 

The bearings are 3/16" at both ends and any damaged can be replaced. If there is too much wear on the cup or cone surfaces, the hub would need to be replaced. 


To put it all back, I applied a liberal amount of grease and pushed the bearings into that. 

The grease holds them in place for assembly. It is generally recommended that the grease should not be packed in because too much grease could overheat the bearings. To avoid that, I let most of it get pushed out by the bearings and the axle as they are inserted. To my mind, that leaves about the right amount of grease. It's not an exact process.


I found it was necessary to put the drive side seal on the axle before fitting. Remembering that the inner lip faces outwards to go slightly inside the groove in the fixed cone flange. Fit the axle, careful not to dislodge any of the 13 loose ball bearings.

Turn the wheel over to have the non-drive side facing upwards and drop in the bearings in their retaining ring. The cone wont' fit if the retaining ring is up the wrong way. It's fairly obvious, the more open part of the ring, revealing more of the bearings, faces outwards. 

It is not necessary to use a retaining ring, 13 individual bearings do the same job. The ring is just for ease of assembly.

With the bearings in place, slide on the seal, with the inner lip outwards.


Screw on the cone and the lock nut.

Now the tricky bit, and the reason I prefer sealed bearings and not cup and cone! The umpteen attempts to get the pre-load just right. The cone has to be tight enough against the bearings to get rid of the play but loose enough so it still rotates freely! Several locking, fitting, testing, unlocking and try again, and I had it just right.

A nicely running wheel with no play.

==

Sunday, 20 February 2022

Wheel carrier modification

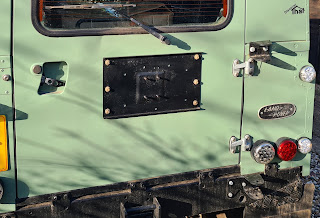
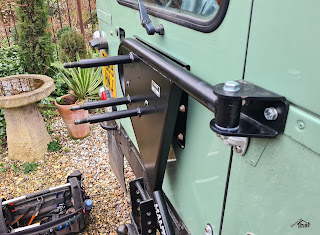
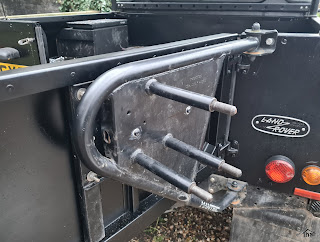
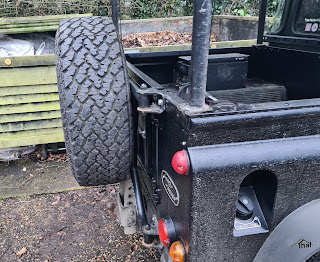
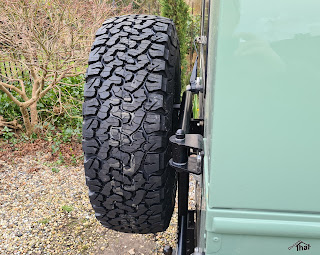
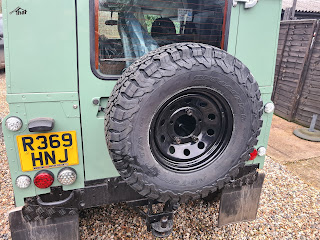
I've had a Mantec swing away wheel carrier, fitted to a Land Rover Defender, for several years. A similar design is now sold by Britpart. The Mantec wheel carrier has worked well. It's a nice robust structure and opens with the door.


To allow it to swing with the rear tail door, the original design uses a large plastic plunger. This works well to allow the wheel carrier to move with the door but has the disadvantage that unless it is exactly aligned, the carrier will lift the door off its hinges. This happened to ours when it was moved to another Land Rover.


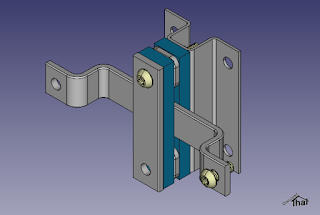
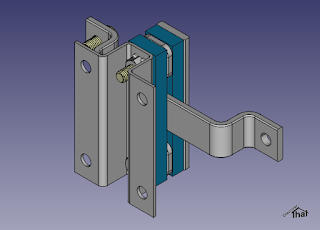
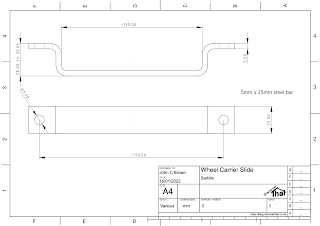
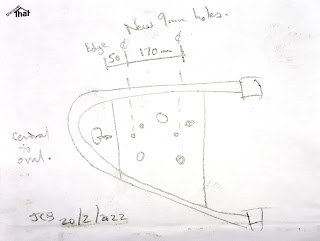
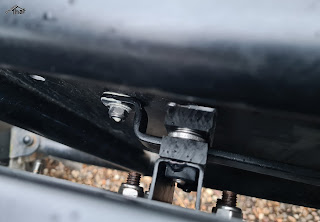
That got me thinking and I came up with a design that slides in both directions, so the door position is not influenced by the carrier at all.


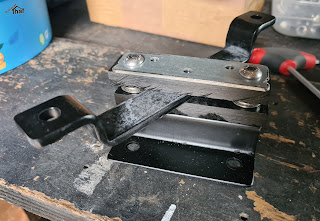
A friend made up a couple of jigs from my designs and pressed the more difficult parts in his workshop. 


I put them together in my shed. I cut the two plastic sliders from some 10mm thick nylon like material I had bought many years ago for another project.


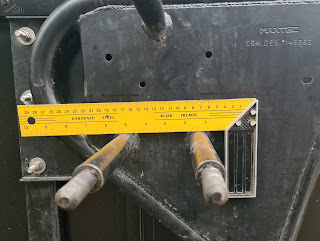
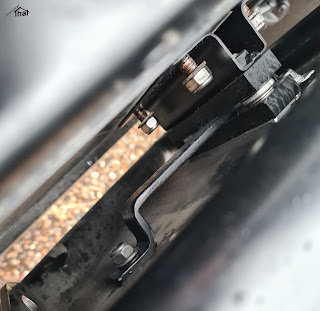
The carrier needs two 9mm holes drilled. These need to be along the same centre line that the original plunger fitted. This is easy to find by looking at the oval hole in the end plate, where the plunger used to bolt through.


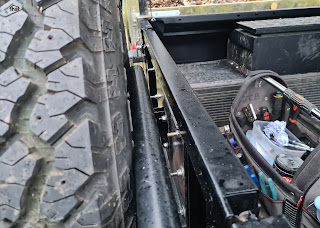
There is little room between the door and the carrier. 


It took a little experimenting to work out the easiest way to get the nuts on in that confined space. For me, the best method was to loosely attach the larger strap to the carrier first and then put the nuts on the door side.


I've fitted it to two cars and, so far, it's worked very well.


The carrier does not need any alignment when fitting so everything can be bolted up tight, as you go.


==

(C) Copyright 2022, John C Brown.

Please ask permission before using this design.

==


Sunday, 28 March 2021

Bike build - Part 5

Tyres

I'm not sure putting tyres on the wheels really counts as being part of the bike build but as it is essential, I thought I'd include it.


I've selected the same tyres and wheels that we have on other bikes and I have some tips, in another article, about fitting them.


All our mountain bike tyres are setup as tubeless.


The Schwalbe, Hans Dampf, tyres need a lot of effort to get them on the rim.


I like Hope Fortus wheels. Their Pro 4 hub just feels and moves as a quality component should. The 26mm rim size suits the 2.35" width tyres that I like to run.


==

Bike build - Next instalment

Bike build - Previous instalment

Bike build - Part 1

==


Tuesday, 4 February 2020

141 QR hub bike wheel

I am told that one of the areas that manufacturers can skimp on to reduce the price on lower budget bikes, is the wheels. I have already discovered that could be the case on my bike. It's less than 6 months old and already the rear hub sounds rough and grainy.


The bearings, in my rear wheel, are loose ball, cup and cone. Serviceable but obviously vulnerable to the ingress of grub. Not only that but the freewheel has a large angle before it engages. I'd noticed, while riding, that I had to rotate the pedals quite a way before I could get them in to a semi-comfortable position to pull away. I hadn't thought much about it until I looked closely at Shelley's and Dean's bikes. As I rotated the cassette, I noticed how much smaller the ratchet angle was. It's obvious to me now that better hubs have smaller angles before the ratchet engages.

The rough bearings and the poor freewheel, combined, has led me to want to change the rear wheel for something better. Something with sealed bearings.

My Giant Stance came with a rear wheel with a 141 QR (Quick Release) hub. This is a relatively new size and I could not find a pre-built wheel, stocked by any of the major suppliers that I looked at.

I did a lot more searching and, with a bit of knowledge, it's not as tricky to get new wheels as it would first appear. I could easily have had them custom made however, it is also possible to get an off the shelf option at a more acceptable price. The 141 QR fitting is a boost 148x12 TA (Through Axle) hub with the end caps replaced for the same QR end caps fitted to 135 QR hubs.


Not all hubs have replaceable end caps but there is a good choice that do. I found several well respected models and a video showing exactly what I wanted to do. I opted for the Hope Pro 4 hub because a complete rear wheel using them and the end caps were stocked by Chain Reaction Cycles.


It's an easy job to pull off the end caps and swap them for another size.


It just needed a little bit of gently leverage to pry the end caps off. The new ones just push on and I now have 141 QR wheels with a better quality freewheel hub.


I've fitted it to the bike to check it fits. I just have to seal the rim, swap over the tyre and inflate it to pop on the bead. After that, I'll add a couple of small bottles of Stan's No Tire, Tire Sealant and re-inflate.


I should then have a much better performing rear wheel that will need less servicing.

==

Summary:

142x12mm TA converted to QR end caps = 135 QR
148x12mm TA converted to QR end caps = 141 QR

==

QR141, QR 141, 141 QR, 141QR.

Saturday, 13 October 2018

Smarter wheels

Today the refurbished alloy wheels arrived and were fitted with new Goodyear Wrangler DuraTrac tyres.


The wheels were from eBay and I had them refurbished by Tyre-Smart in Witham, Essex. They send them to a company, I think they said they are in Kent, which specialises in refurbishing wheels.


They have done a fantastic job, I am very pleased.


I deliberately wanted to stick to genuine Land Rover wheels. There are plenty of other alloys but I did not know if they had been designed with off-road abuse in mind. I thought it better to stick to genuine Land Rover wheels.

I used copies of old brochures to make sure that what was for sale on eBay was genuine Land Rover. There are some very close looking that were not Land Rover options. There are also plenty of already refurbished Land Rover wheels but they were more costly than having my own done.


The 63mm black centre caps are easily available from eBay.

It took me ages to select the tyres I wanted. From past experience, I know I am unlikely to swap the wheels round just to go off-road, or more commonly, not swap back for on-road use. I was therefore after a set of all-terrains that I could drive on all the time but as chunky as I could find to give me the best chance of traction in the mud off-road.


By chunky I mean that they have wide tread spacing and, for me, most importantly a more square profile, viewed front on. The idea is, that gives better side wall grip to pull out of muddy ruts. That's just my thinking, apart from my own experience, I have no evidence of this being better.

I like B F Goodrich All-Terrains but they are not available in a size suitable for a Discovery 4 without changing the rolling circumference. I wanted a standard overall size. Partly so the odometer reading remains correct but also to avoid insurance complications.

Eventually I found the Goodyear Wrangler DuraTrac in 255/55R19 111Q.
The Goodyear web site is hopeless, it does not show any of the tyre sizes, I nearly didn't look at them but the tyre dealers had more information and there were a few good reviews by other Land Rover people.


The DuraTrac tyres are exactly what I was after. I've driven them for about 70 miles, so far. Nearly all on-road, except for a dry grass car park, and I am very pleased with them. I can't notice any road noise, if there is any, its definitely not intrusive. Not that I worry about that, I drove the D2 on mud-terrains for a year.


I've also replaced the spare wheel and tyre. I like all my tyres and wheels to match so I can swap them round.


I am not keen on space saver spares, so that had to go.


I've fitted the spare with a security plate to reduce the chance of it being stolen.

==