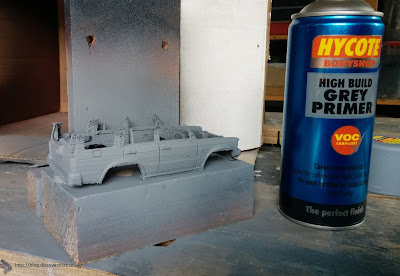
A car's body work is not normally covered in lines so I've started some experiments to find a way to clean them up.
First trials are with High Build primer.
I have lots of failed prints so plenty of body panels to try out various methods.
I started with 3 layers of high build primer. As per the instructions on the side of the can. Each coat about five minutes apart.
 |
| High tech way to keep the dust off |
I let it dry for a day then sanded it down. I'm experimenting with 3 different sanding methods.
By feel the hand sanded method, on the rear panel in the above photo, has worked best.
The cylinder sander, used on the front door, is too rough and takes off the detail too easily. The disc sander, used on the top of the front wing, works OK but it is difficult to follow the contours. I have left the rear door un-sanded to see how the high build primer works on its own.
The PLA/PHA plastic is surprisingly easy to sand by hand and the result feels and looks best.
I've given it another 3 thin coats of the high build primer and all the detail is still clearly visible. Tomorrow I'll have another look.
==
Edit: 18 August 2015
I've added a top coat of gloss to show up any imperfections.
The photos show that hand sanding the high build primer can produced a good finish without loosing too much detail. The panel round the fuel filler cover, shown in the above image, was hand sanded in the direction of the grain, along the print lines. That looks good to me.
The panel under the filler cover was sanded against the grain. You can see a slight roughness. I suspect this is caused by, what I call, furry plastic. It does not sand cleanly.
Areas like the vertical edges round the lamp housings and the pillars will need some filler and extra work to get a crisp edge.
I'm pleased that the results of the experiments have given me a straight forward way to complete the finish of the model.


No comments :
Post a Comment