I have finished and installed the gate I 3D printed a few weeks ago.
With a few finishing touches to the ground and bushes round the gate it blends in on the layout.
I masked off areas to avoid the PVA glue and scatter grass making a mess in the wrong places.
Search This Blog
Thursday, 23 July 2015
Sunday, 19 July 2015
50th Birthday BBQ
Shelley arranged a great day yesterday for my 50th birthday.
We had a few friends and family round for a barbecue lunch in the garden.
Linda, her husband, Rob and their two waitresses, Megan and Jo, did an excellent job setting up, cooking and serving us all.
Even the cats were having a good time.
The weather was perfect, warm and sunny with a slight breeze to keep us cool.
I had setup a Scalextric. That turned out to be very popular. Shelley gave out "clear round" rosettes to anyone who completed two laps without coming off.
Gwen's mum, Gloria, was one of the first up. She'd had practice at Christmas so knew what she was doing.
Much to my surprise and delight, Don bought me an Audi R8 and Andy and Lisa bought me a Mini with another to follow. When I got a moment I put some digital chips in so they could be tried out. The Audi stuck to the track very well but the Mini held its own.
By the end of the day the Mini no longer had it's spoiler and a wing mirror and the R8's fin was only held on one side. All easily repaired.
I got 50 boxes of Smarties from Keith and Vanessa and a T-shirt from Lee and Lisa with an appropriate theme :-)
When everyone had gone, there was only one thing to do...
We had a few friends and family round for a barbecue lunch in the garden.
Linda, her husband, Rob and their two waitresses, Megan and Jo, did an excellent job setting up, cooking and serving us all.
Even the cats were having a good time.
The weather was perfect, warm and sunny with a slight breeze to keep us cool.
I had setup a Scalextric. That turned out to be very popular. Shelley gave out "clear round" rosettes to anyone who completed two laps without coming off.
Gwen's mum, Gloria, was one of the first up. She'd had practice at Christmas so knew what she was doing.
Much to my surprise and delight, Don bought me an Audi R8 and Andy and Lisa bought me a Mini with another to follow. When I got a moment I put some digital chips in so they could be tried out. The Audi stuck to the track very well but the Mini held its own.
By the end of the day the Mini no longer had it's spoiler and a wing mirror and the R8's fin was only held on one side. All easily repaired.
I got 50 boxes of Smarties from Keith and Vanessa and a T-shirt from Lee and Lisa with an appropriate theme :-)
When everyone had gone, there was only one thing to do...
In Car Phone Holder
When Andy bought Joe, his Land Rover Defender 90, it came with a 3D printed phone holder on the dashboard.
That holder was designed for something like an old iPhone 4 perhaps even a 3. His HTC One phone did not fit.
I took some measurements and came up with my own design that fitted in the same size hole in the dash. Andy had some specific requirements and knowing where the phone displayed things on the screen, he pointed out some critical sizes to make the phone usable in the holder.
On my first attempt I made a mistake with the width so it would not fit. This was not a bad thing because based on seeing that first prototype I was able to incorporate some better ideas.
I thinned down all the uprights, reduced the thickness of the top ledge and adjusted some of the angles so they print without supports. The most significant design change was that I made the charger plug hole in to a wedge shape to grip the charging lead. A separate cover goes round the connector and fits in to the wedge.
The small two part wedge holder for the charging lead can be redesigned and adjusted to whatever shape connector needs to fit it. The body of the phone holder remains unchanged.
The second print fitted the phone perfectly.
STL file for the phone holder
STL file for the USB connector
Licence attribution
==
That holder was designed for something like an old iPhone 4 perhaps even a 3. His HTC One phone did not fit.
I took some measurements and came up with my own design that fitted in the same size hole in the dash. Andy had some specific requirements and knowing where the phone displayed things on the screen, he pointed out some critical sizes to make the phone usable in the holder.
On my first attempt I made a mistake with the width so it would not fit. This was not a bad thing because based on seeing that first prototype I was able to incorporate some better ideas.
I thinned down all the uprights, reduced the thickness of the top ledge and adjusted some of the angles so they print without supports. The most significant design change was that I made the charger plug hole in to a wedge shape to grip the charging lead. A separate cover goes round the connector and fits in to the wedge.
The small two part wedge holder for the charging lead can be redesigned and adjusted to whatever shape connector needs to fit it. The body of the phone holder remains unchanged.
The second print fitted the phone perfectly.
Downloads
Blend fileSTL file for the phone holder
STL file for the USB connector
Licence attribution
==
Friday, 17 July 2015
Scenic Views
The greenery is dry, the grub is vacuumed away and the track is back down.
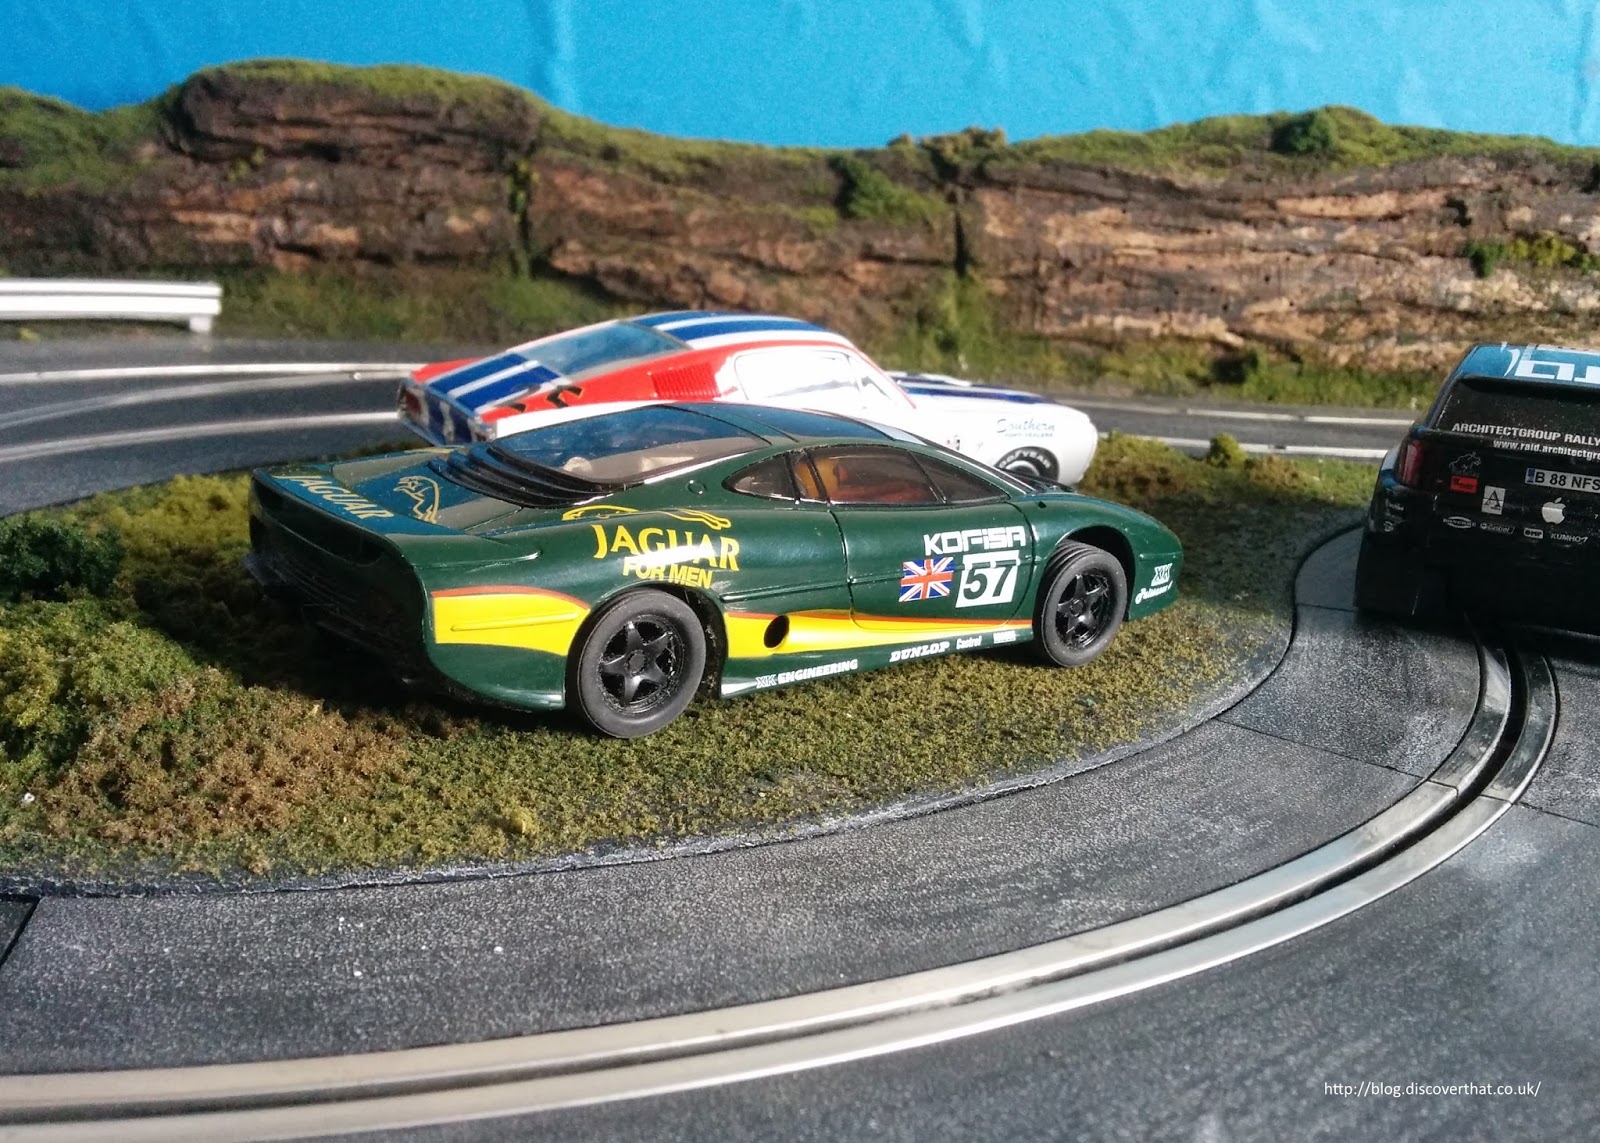
I've squeezed in so much track there are not many flat areas to park cars. On this corner where there is some space I've cut a couple of slots so the guides of the cars drop down and the wheels stand naturally on the ground.
I have a few more ideas for little touches to add more detail but the big work is all now done.
I've squeezed in so much track there are not many flat areas to park cars. On this corner where there is some space I've cut a couple of slots so the guides of the cars drop down and the wheels stand naturally on the ground.
I have a few more ideas for little touches to add more detail but the big work is all now done.
Thursday, 16 July 2015
Shrubbery
A quick photo update of the last two evenings work.
You can see how much watered down PVA glue I'm spraying on by the white tide mark in the above photo. Amazingly, it dries clear by the following morning.
Subscribe to:
Posts
(
Atom
)