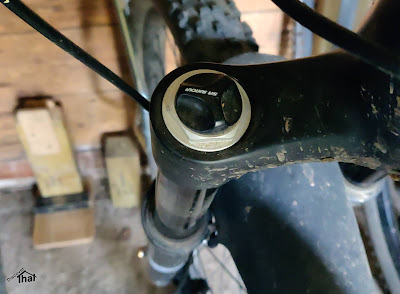
He's been adjusting the air spring behaviour by adding or removing tokens. The regular removal of the air side insert was leaving signs on the anodising. A plastic socket would be less likely to leave a mark and the air side insert is not done up very tight.
Dean sent me a sketch which included some useful features:
- 19mm hex at the top for a spanner (A 19mm spanner is the largest in a normal set of tools)
- 8mm hex hole for an Allen key.
It took three prototypes to get a version that printed out neatly and could be easily cleaned up. The main design change was to add a slope at the bottom of the 8mm hex tube so, when printed upside down, that tube did not have supports inside that are tricky to clear out cleanly.
In the process I discovered that Fox use 26mm nuts and Suntour use 27mm, in addition to the 24mm used by Rockshox.
I made a set of three, each with the size printed on them.
The 19mm hex is oversize to be tight in a 19mm spanner. The 8mm is oversize to allow for 3D printed shrinkage and was trial and error to get a tight fit.
We don't know how long they will last. I've printed them in PETG being the strongest plastic I have been able to print with.
PETG is a bit finicky to print with. The slower the better. These are the settings I used this time:
Temperature = 240C
Bed temp = 80C
Infill = 100% (Solid)
Print speed = 30mm/s
Support speed 14mm/s
Travel speed = 90mm/s
Cooling = No fans
Supports = only from the print bed
Adhesion = 8mm brim
These settings are for use with an Ultimaker 2+ printed on to the glass without any adhesion aid.
Each took about 4 hours to print.
PETG tends to stick to the nozzle and sometimes this forms lumps and messes up the layers. If this happens somewhere significant I tend to abort the print and start again.
==


No comments :
Post a Comment