Not all diagnostic tools can use that code to programme a key but I had already checked that the Nanocom Evolution can before purchasing the key.
The refurbished unit is a new looking plastic case a new key blank with a circuit board, no doubt from a scrapped Discovery or other vehicle using the same security system.
I had the key cut at a normal high street key cutting shop. The first shop I tried refused to cut a customer supplied blank but the second shop didn't hesitate. It was not a perfect fit but I got it to work.
There is a good video tutorial produced by Nanocom on YouTube about how to programme the key fob to your own car and some vague instructions in the BCU information downloaded from their web site.
It is difficult to play a video while sat in the car trying to use the Nanocom so I have transcribed a reminder of the important bits here so I can print them out.
An important requirement is that the immobiliser is disarmed before any keys can be programmed. That can be done using either an existing working key fob or with the Emergency Key Access (EKA) code, using a key in the drivers door lock.
Using a Nanocom Evolution
With the doors closed and the Ignition in at least position 1.
Main Menu
- Discovery II
-- TD5
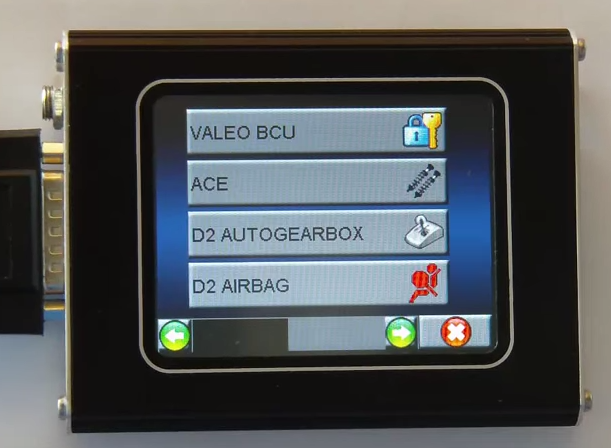
--- Valeo BCU
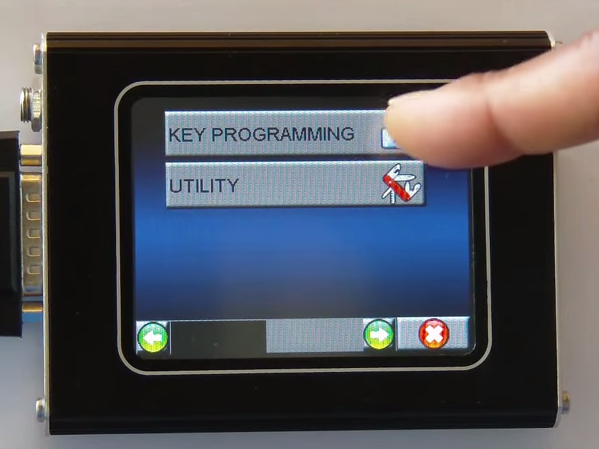
On the SECOND page of the Valeo BCU menu select:
- Key Programming
The Nanocom will display all the existing codes.
Obviously you only want to add your new fob but not overwrite your existing. I had to open my fobs to confirm the exiting 6 digit codes. On my list they were in sequential order and were in the first two key code slots. All my key codes in use start with the number 3.
The third and forth slots contained codes beginning with 6. I have no idea what those last two codes were so I assumed these were the available slots and I used slot 3 for my new key.
- On the slot you have established is your first available, press on the code, not the set button but press on the white area with the code in. Obviously avoid overwriting any existing keys you want to keep working. Be careful, the touch screen may not be aligned very well to your finger pushes. Check that the screen displays one of the spare numbers not one of your existing numbers. Press OK to go back if you you need to.
- Once you are sure you are on the edit screen for the correct spare code, erase the existing code.
- While still on that screen enter the new code from the sticker on the chip inside the fob. (Mine came with the code written on a card to save having to open the fob.)
- Press OK to enter that code and return to the previous menu listing the codes.
- Press the SET button next to that code just entered.
Scroll to the second page
- Press the SYNC button next to the key being added.
Read the instructions on the screen to press any button on the fob, the video shows using the unlock button.
After having pressed the button on the key press the OK to write this to the BCU.
Once written you will be prompted to press OK again.
- Now press the KEY DETECT button.
Again press a button on the fob when prompted and after pressing the button on the key press the OK button on the Nanocom.
Once written to the BCU the word DETECTED will be displayed next to the new key.
That's it. The key fob should now be registered to the car.
I disconnected the Nanocom and checked all three of my key fobs to ensure they locked and unlocked the car and they did :-)
==
April 2018:
For the benefit of those with other diagnostic tools
A Nanocom can use the short code that should be on a sticker inside the key fob, other diagnostic tools need the longer barcode that is nearly always missing when you buy a used key fob.
Someone else created a spreadsheet that can convert from the short code to the long code.
The original spreadsheet has been marked to say it would stop being hosted from December 2017 although, at the time of writing, it is still available as read only and can be downloaded to use it.
I have taken a copy and made it available to download from here:
disco2_fobcode_20130409.ods
disco2_fobcode_20130409.xlsx
Both versions are the same, just different file formats for use depending on what spreadsheet application you use. Microsoft Excel and Google Docs will open both of them.
There is no point in asking me about the functionality. I did not create the spreadsheet and I have never needed to use it.
==


No comments :
Post a Comment