Search This Blog

Sunday, 25 September 2022

Speedometer setup cable

To change the settings and calibrate the Daytona speedo that is on Dean's motorcycle, there are two buttons on the underside of the unit. Alternatively, an extension cable can be fitted. As calibrating the speedo required pressing a button while traveling along, it needs at least one of the buttons on the handlebar.


The buttons just connect a lead to ground, so I soldered up a couple of push buttons I had handy. My intention was to simply tape them to the handlebars. They were only going to be used the once.


I got carried away. I quickly designed and 3D printed a clamp to hold them on the bars.

If it was going to be a permanent fixture I would probably have designed it to look a little different but for our purposes, it did a good job.

I deliberately removed one of the button caps, so there was no doubt about which button to press to set the calibrated speed. Having first set the speed to miles instead of kilometres, Dean rode the bike and followed me driving the car at 40mph to set the speed as per the instructions. It did what we expected and the speedo now reads roughly the right speed.

==


Tuesday, 20 September 2022

Machinist's jack

 Another little practice project using the lathe.


A machinist's jack. Used to support work, among other things.


I made it from an off-cut of steel I had next to the lathe and some M8x1.0mm (fine thread) screws. The top of the screw head is machined off flat.


I've learnt:

  • Tapping a long thread is hard going. Especially as I only had a budget tap in that size!
    I did drill out some relief on the base, but not as much as I could have done.
  • I don't know how to use the knurling tool properly.
    The result is not as pronounced as I would have expected.


A good first attempt. I'm sure the next will be better.

==


Saturday, 17 September 2022

Service a Shimano Deore wheel hub

I think it is a Shimano M6010 or earlier version of a similar hub. It's definitely a Shimano Deore 142x12 mountain bike hub.

It had more play than I was happy with so needed a service.


I am pleased to say it is similar to other Shimano hubs that I have taken apart.

The locknuts undo with two 17mm cone spanners from the non-drive side. That releases the axle which can be drawn through, being careful to catch any ball bearings that drop out.

I rest the wheel over a plastic tub, so anything that falls out, goes in the container.


There is a dust seal at each end. Note that they have a slight lip that fits upwards into a recess in the back of a flange running round each bearing cone. The dust seals are easy enough to hook out with a screw driver, or pick. That reveals the bearings.


The non-drive side bearings are held in a retainer ring, so they all come out in one go.

Flipping the wheel up the other way, the dust cap can easily be removed and I used a magnet to remove the individual drive side ball bearings.


The next stage is simply to clean everything up thoroughly and inspect. 

The bearings are 3/16" at both ends and any damaged can be replaced. If there is too much wear on the cup or cone surfaces, the hub would need to be replaced. 


To put it all back, I applied a liberal amount of grease and pushed the bearings into that. 

The grease holds them in place for assembly. It is generally recommended that the grease should not be packed in because too much grease could overheat the bearings. To avoid that, I let most of it get pushed out by the bearings and the axle as they are inserted. To my mind, that leaves about the right amount of grease. It's not an exact process.


I found it was necessary to put the drive side seal on the axle before fitting. Remembering that the inner lip faces outwards to go slightly inside the groove in the fixed cone flange. Fit the axle, careful not to dislodge any of the 13 loose ball bearings.

Turn the wheel over to have the non-drive side facing upwards and drop in the bearings in their retaining ring. The cone wont' fit if the retaining ring is up the wrong way. It's fairly obvious, the more open part of the ring, revealing more of the bearings, faces outwards. 

It is not necessary to use a retaining ring, 13 individual bearings do the same job. The ring is just for ease of assembly.

With the bearings in place, slide on the seal, with the inner lip outwards.


Screw on the cone and the lock nut.

Now the tricky bit, and the reason I prefer sealed bearings and not cup and cone! The umpteen attempts to get the pre-load just right. The cone has to be tight enough against the bearings to get rid of the play but loose enough so it still rotates freely! Several locking, fitting, testing, unlocking and try again, and I had it just right.

A nicely running wheel with no play.

==


Thursday, 8 September 2022

Oil filler cap

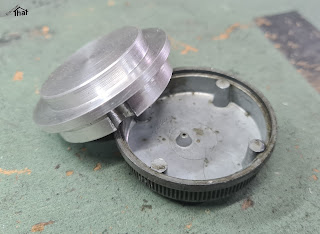
The oil filler cap on Dean's motorcycle leaked, so I put the lathe to good use again.


We wanted to retain the original stylish top.


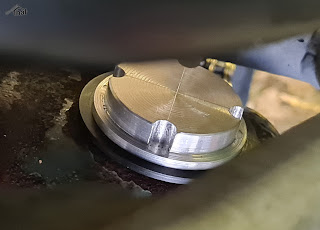
As I don't have a milling machine, I put an end mill in the drill press chuck and used that to form the cut-outs for the cap to fit over.


The spring clip was ground down from one taken from a budget filler cap bought off of eBay. It was secured with two M3 screws.


I have not glued on the cap yet. We're going to check it does not leak before I make it permanent.


It looks good and fits in perfectly.

==


Update: 14 Sept 2022

It's been test ridden and no leaks, so I've now glued and pinned the top in place.

I've also used a better fitting rubber washer, 36mm ID 3mm thick.


==

Saturday, 3 September 2022

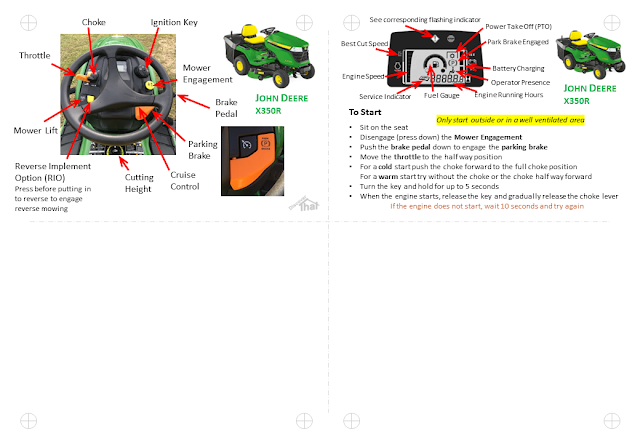
John Deere X350R quick reference

The John Deere X350R is a very nicely made lawn tractor, however, the instruction manual is not very user friendly.

As we use ours infrequently, I've produced a small quick reference sheet as a reminder which includes the basic, essential, information, such as how to start it.


This is intended to be folded to make a conveniently sized double sided guide.

==