Search This Blog

Saturday, 30 May 2015

Roof Rack

Today our new roof rack arrived for the Discovery.


It's been a while waiting but it is the exact design I wanted.


It was made by MCB4x4. I paid the deposit at the Peterborough Land Rover show last year and sent them the design about 6 months ago.


It arrived just before mid-day all the way from Huddersfield in a white van. I needed some help from Shelley and some very handy neighbours to lift it on, Lee and his son Sam. The rack is not that heavy but you need someone on each corner to lift it in place.


I designed my own rather than buy one off the shelf because I could not find one I liked. The style I prefer is the type used on the G4 Challenge D2s.


The trouble is they are so low they stop the sunroofs opening. My design has a flat load bed just high enough for both sunroofs to open.


I tried it out and as designed both sunroofs open fully. The rear one fits through a gap between the bars. When fully open the upper edge is lower than the top edge of the rack bars so even fully laden, the sunroofs can be opened.


The rest of it is appearance. The lines of the car follow through to the roof rack making it look just right.


==

Edit:

We have been out several times now and so far have not noticed any wind noise. My guess is that because the front is sloped back with a central wind deflector, the air is pushed up the front window and flows over the top.

I expect that will change once the lights are on it.

Wednesday, 27 May 2015

3D Me

A few days ago I went to the 3D Printshow in London.


This spanned 2 floors of the old Truman brewery in the East end.

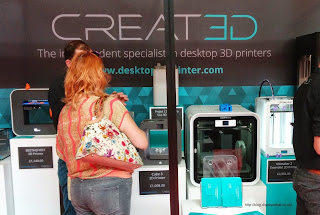
I was mainly interested in the desktop 3D printers but there were larger industrial machines in use and some 3D scanners.


I spoke to lots of people, looked at lots of small plastic objects plus a few wooden and ceramic ones, confirmed my choice for the printer I would like to get and was scanned in 3D.


I have just received the 3D model file of myself. You can look for yourself in a 3D view on the Sketchfab web site.

Here's what I look like on Sketchfab.


I have been able to download the model and import it in to Blender.  I can now make me look like anything I can think of but here I am before any editing :-)


They used a Structure scanner attached to an iPad using the ItSeez3D app to take the scan.  It only took a few seconds to walk round me to take that 3D capture.

3D mouse with feeling
I saw a couple of 3D scanners at the show, a few related gadgets and so many different makes and models of 3D printer.


Plastic fabric


They were also 3D printing food.


There was an art exhibition with many abstract pieces.


One of the interesting uses was for medical applications where 3D printing is being used for many things from helping to make surgery more accurate to replacement parts.


So many possibilities.


Sunday, 24 May 2015

The Hills

I've been working on the grassy bits of the scenery for a few weeks.


The hills are made with plaster filler over Modrock plaster of Paris bandages with floral foam as the base.


The floral foam is very easy to shape but it is too fragile on its own.


I tried using filler directly on the foam but the filler sticks to the pallet knife better than the foam. The foam is a good base for Modrock. I then used filler over the Modrock which works well.


A few more stages all with time to dry between each. Paint, scatter grass and then bushes.


With some experimentation I found I prefer to paint on the first layer of PVA glue used to secure the scatter grass. The spray glue is a bit too weak.


The Woodland Scenics tutorials show all the scenery being added in one go but I found if I tried to add bushes before the grass was set then I would mess up the grass. Much easier to wait a day for it to dry.


The last bit is to add back the crash barriers. These just push in to 6mm holes drilled in the MDF base.