Tuesday, 7 July 2026

Modular gothic mission ruins

I was asked to print enough modular building components for a small firefight size game.


This is what I came up with.


There are a few new components and a new download for my modular scenery range.


Download That_Modular-Sets 6-9 Gothic mission ruins


These buildings require all of the original downloads in addition to the above.

The following article has the original downloads:

https://blog.discoverthat.co.uk/2026/05/modular-scenery-buildings.html


==

Monday, 6 July 2026

Fast printing PETG filament

In June 2025 Bambu Lab were out of stock of their PETG-HF (High Flow) filament, worldwide. Because of that, I was forced to try other makes. 

I should point out, that apart from the odd specialist filament, like TPU, I almost exclusively print using PETG. I mainly print functional parts and they are often for use inside cars. The UV resistance of PETG is needed to maintain its strength from prolonged exposure to sunlight and the heat resistance is needed to avoid warping.

As mentioned in an earlier article, I wanted to be able to use an alternative filament as a direct replacement for the Bambu Labs version, without the need to change any settings on my Bambu Lab H2D.

This page list the filaments that I have tried and I'll start with the benchmark, the Bambu Labs filament:

==

Bambu Lab PETG-HF


  • Print settings: Automatic defaults.
  • Colours tested: Black, Red, Yellow, Green, Blue, Grey and White.
  • Print Result: Good. Negligible stringing, few blobs, tidy seams.
  • Surface: Satin to matt.
  • Spool AMS compatibility: Good (OD 200mm, ID 55mm, Width 67mm)
  • Number of kg spools used: >10.
  • Print fails: None.
  • Eco: Very good, uses refills.
  • Usage dates: May 2025 ongoing (while stocks last.) Discontinued June 2026.
  • Cost: ££ when buying in bulk or ££££ for individual spools.
==

Filament Choices

The main criteria for selecting the following filaments have been the cost at any point in time, and that they get substantially good reviews on Amazon.

If a spool is on special offer, I have taken advantage of that, as my next filament to try. 

These are in the order I tried them:

==

Sunlu Rapid PETG


  • Print settings: Same as Bambu Lab PETG-HF.
  • Colours tested: Black.
  • Print Result: Usually good. Negligible stringing, few blobs. Developed very untidy seams before the nozzle clogged.
  • Surface: Satin to matt.
  • Spool AMS compatibility: Good. (OD 195mm, ID 63mm, Width 59mm)
  • Number of kg spools used: 6.
  • Print fails: 1x clogged nozzle.
  • Eco: Poor. Reusable plastic spool but no refills available.
  • Usage dates: June 2025
  • Cost: ££
==

Tinmorry Rapid PETG-eco


  • Print settings: Same as Bambu Lab PETG-HF.
  • Colours tested: Black and Light Grey (too pale).
  • Print Result: Usually good. No stringing, few blobs. Usually tidy seams but one spool of light grey was a little ragged.
  • Surface: Satin to gloss.
  • Spool AMS compatibility: Good (OD 197mm, ID 53mm, Width 64mm)
  • Number of kg spools used: >10.
  • Print fails: 1x clogged nozzle.
  • Eco: Poor. Disposable plastic spool.
  • Usage dates: June to August 2025
  • Cost: ££
==

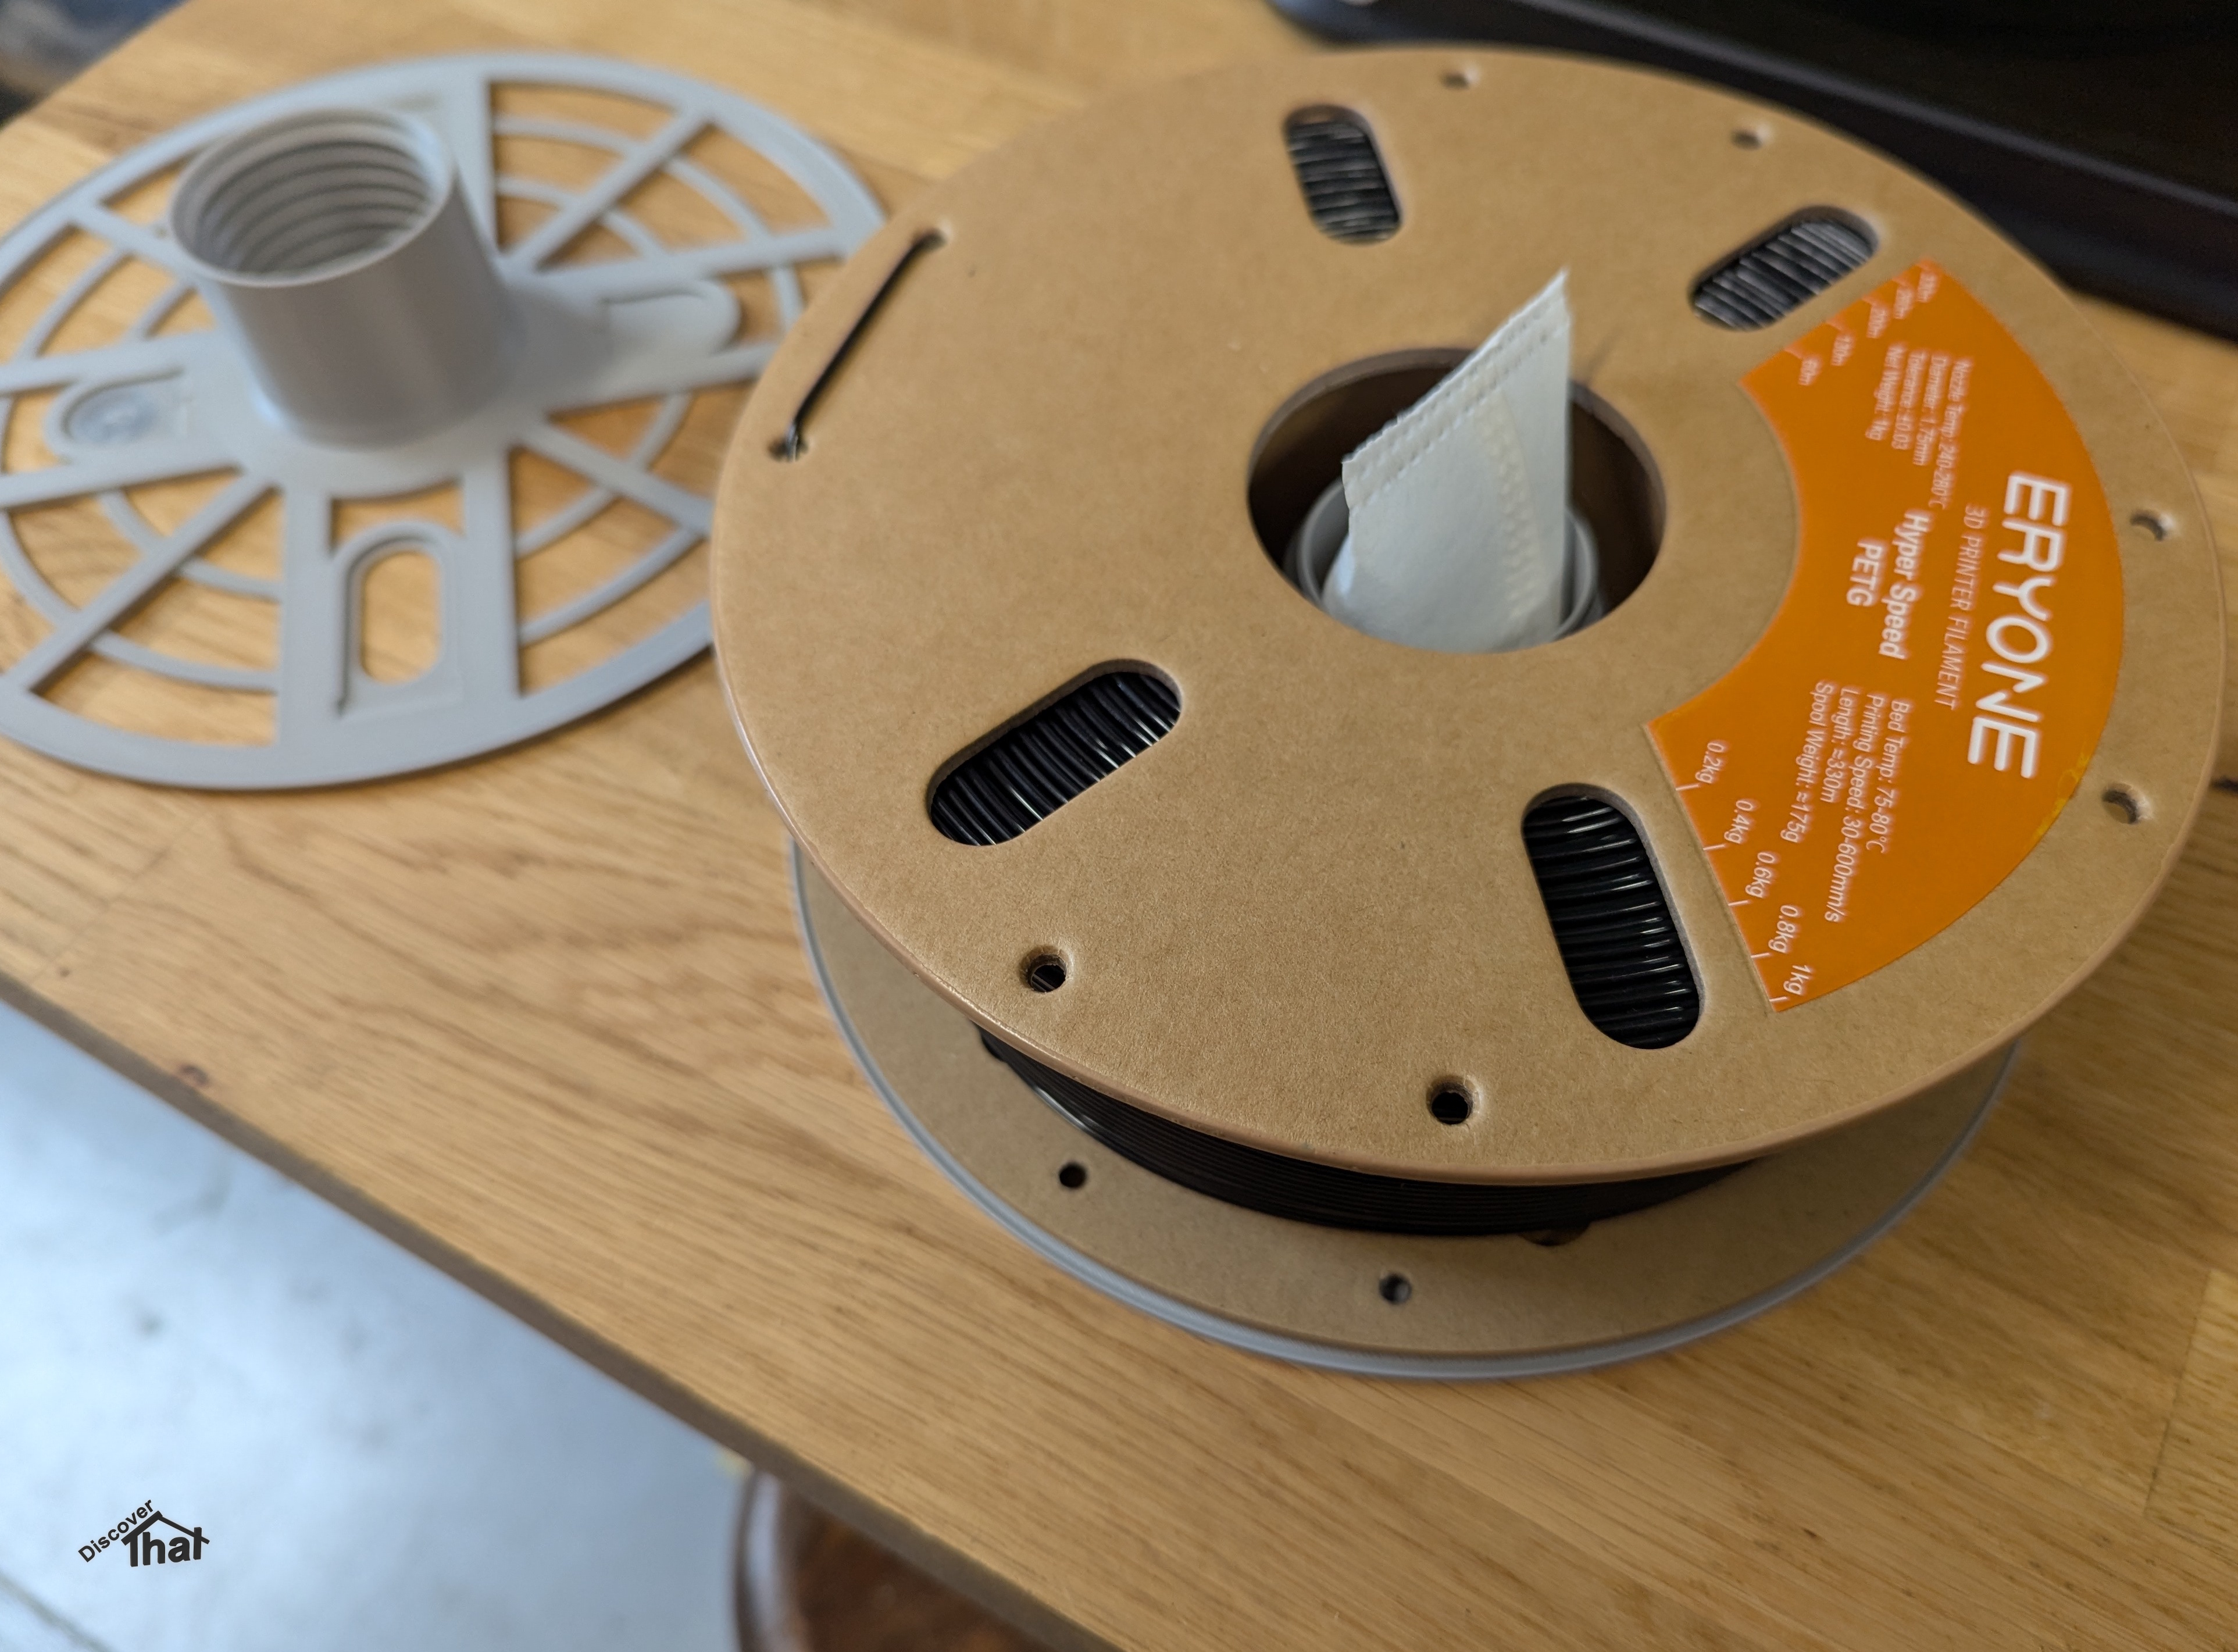
Eryone Hyper Speed PETG


  • Print settings: Same as Bambu Lab PETG-HF.
  • Colours tested: Black and Grey (dark).
  • Print Result: Very Good. No stringing, no blobs, tidy seams.
  • Surface: Gloss.
  • Spool AMS compatibility: Cardboard spool with coated edges. I used an overlay adapter.
  • Number of kg spools used: 3.
  • Print fails: None.
  • Eco: Good. Cardboard spool.
  • Usage dates: June and July 2025
  • Cost: ££
==

Deeplee Rapid PETG


  • Print settings: Same as Bambu Lab PETG-HF.
  • Colours tested: Black and Grey.
  • Print Result: Good. Negligible stringing, no blobs, tidy seams.
  • Surface: Satin to gloss.
  • Spool AMS compatibility: Cardboard spool with coated edges. Too wide to use my usual adapter. With care the inner core fits perfectly in a Bambu Lab reusable spool.
  • Number of kg spools used: >10
  • Print fails: None.
  • Eco: Good. Cardboard spool.
  • Usage Dates: July 2025 to February 2026
  • Cost: ££

Tip: When disassembling the spool, I take the end of the filament out of the notch and put it back in the notch. This is to make sure it is free to release when needed. I have found that the end of the filament is often too tight a fit in the notch in the cardboard tube and sometimes the AMS is unable to pull it out. When that happens the printer stops with a filament warning.

==

Overture Refill PETG (High Speed for Bambu Lab)


  • Print settings: Same as Bambu Lab PETG-HF.
  • Colours tested: Black and Grey.
  • Print Result: Good. Negligible stringing, no blobs, tidy seams.
  • Surface: Satin to gloss.
  • Spool AMS compatibility: Refill fits in a Bambu Lab reusable spool.
  • Number of kg spools used: <1
  • Print fails: None.
  • Eco: Very good. Cardboard core refill.
  • Usage dates: June 2026 ongoing
  • Cost: ££
Note: The first roll I used was a very tight fit in the Bambu Lab spool. It did fit but I was unable to pull the plastic wraps out. With the wraps cut short either side, it worked without issue . The next roll fitted perfectly and the wraps came out easily.


==

Subjective Views

The results above are my opinions after a relatively limited number of hours printing with each filament. This is not an organised review or test, this is just a reminder to myself of how well filaments have performed for me.

I have printed everything at Bambu Labs defaults for speed and temperature. I have not attempted to establish the fastest speed a filament can print at. I want to be able to print reliably, repeatably and with minimal tinkering.

My only changes have been to affect the strength appropriate to the component I am printing. Things like wall thicknesses and infill densities.


AMS Compatibility

Being easy to use in the Bambu Lab AMS 2 Pro and AMS HT is important for me. In my results above, I am referring to those two AMS's. I have no access to any other AMS's to try them with.

The spools in the AMS's run in a guide. This limits the width the spool can be to about 68mm. There is less than 3mm between the guide and the nearest side of the AMS HT. Although this is not a problem for the spools on their own, it causes me an issue using the adapter that I fit to hold the NFC tags. There is a little more room in the AMS 2 Pro, but not much in some slots.


Cardboard Spools

Cardboard spools are not recommended by Bambu Labs for use in their AMS's. As the cardboard wears on the rollers, the dust formed is not conducive to the operation of the AMS over time. Some cardboard spools are manufactured with coated edges to avoid this concern.

Some spool cores conveniently fit the Bambu Labs or other reusable plastic spools. This works well, although I have had some issues where the end of the filament gets stuck between the spool and cardboard core. I try to ensure the end is free when assembling the spool.

For those cardboard spools where the core does not fit in a reusable spool, my preferred solution is to use an overlay spool that sandwiches the entire cardboard spool. The running edge is then plastic. As long as the cardboard spool has an overall thickness of 60mm or less and an overall diameter of 200mm or less, the result fits in the AMS.


Conclusion

All the filaments that I have tried, so far, are good and can be used as direct alternatives to Bambu Lab PETG-HF.


==

First published: 29 June 2025

This page is updated from time to time when I try new filament. Usually when Bambu Labs are out of stock.

From June 2026 I will be buying more alternative filament.

There is a note on Bambu Lab's store saying that they have discontinued PETG-HF. Their alternative is a slower printing Basic PETG, not an improvement for my requirements, so I will not be trying that.

==


Sunday, 5 July 2026

Less is more painting miniatures

I did not have enough time to complete any complex models ready for the game today, so I opted to paint a unit of Prime Strikers from Puppetswar Miniatures. As it happens, I ended up using a different army, so they didn't get to the table, but they were ready.


Very Quick Process

The order was significant in making sure there was minimal time wasted.

  • Prime with black from a rattle can - this had been done weeks ago
  • Airbrush army dull green all over
  • Dark grey paint in the folds behind the knees and between the legs
  • Black wash all over
  • Dry overnight

  • Dry brush in light green to highlight all the edges - using an 8mm flat makeup brush
  • Paint the eye lenses in yellow - using a 00 short bristle sable brush (W&N s7 miniature)
  • Tidy up the yellow - edge in black wherever I had gone over with the yellow
  • Paint the belt buckle grey
  • Paint all the weapons black
  • Dry brush in light grey all the edges of the weapons - using a 3mm wide flat angled shader brush
  • Base using grass flock which sticks to thickly applied brown paint
  • Paint the edge of the base in black
  • Dry overnight

  • Clear matt spray varnish
I am very pleased with the finished result even though very few of the details have been painted in. This is a very good example of "less is more."


I don't know exactly how long it took for this unit of 11 troops, but I spent a few hours on each of two days and 15 mins to varnish this morning.


Where a model has well defined edges, I prefer the subtle result from dry brushing rather than my attempts at edge highlighting. I will use edge highlighting where the alternative would not work.


Some models by their design are complicated and time consuming, no matter what paint scheme is selected.


==