Trying to save time does not always go to plan.
 |
| My version that suits the WM 180 lathe |
I wanted a simple setup to easily and securely mount a dial gauge to the Warco WM 180 lathe. Without one, there is a lot of keeping track of revolution counts on the wheels for the slide.
 |
| The eBay version |
I see little point in re-inventing the wheel and there was a very effective looking clamp available on eBay, that would fit various specific lathes and one for generic Chinese style lathes. It looked like that last one would be right for my lathe.
It clamps well and is a very nice bit of kit, but the WM 180 lathe is too small to use it where I intended. There is insufficient distance between the saddle and the housing for the headstock! The dial gauge pin is pushed through and hits the housing or the saddle hits the clamp as the tool approaches the chuck!
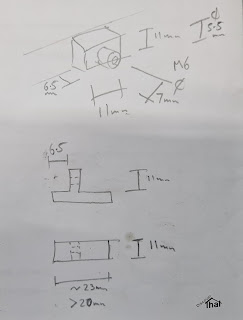
Never mind. I took a few measurements and did a bit of work in FreeCAD and came up with...
... a solution that still wasn't ideal!
It needs a 30mm travel dial gauge which is common enough and I happened to buy from the same supplier as the clamp.
My plan is to make a small striker plate to fit on to a conveniently positioned bolt.
I have not had time to make that bit yet (update: I made that in October.) When it is done, it should make the readings more accurate and have the added advantage that I'll be able to use a shorter travel dial gauge, probably 20mm.
Download:
Dial Gauge Clamp extended STL and STEP files (Zip)
Fittings:
- M6x55mm (or longer) bolt for the clamp
- M6x16mm bolt to hold the dial gauge
- 2x M6 nuts
- 2x M6 washers (not essential)
- No support (using nGen)
- 2.4mm thick walls to give it strength
- Filament: ColorFabb nGen
==
Update:
http://blog.discoverthat.co.uk/2022/10/striker-for-dial-gauge-on-wm-180-lathe.html
==


No comments:
Post a Comment