Wednesday, 29 December 2021

VW Transporter T5 ignition feed for a radio

The radio wiring in the VW T5 and T28, at least for the 2008 model year, does not have an ignition switched live feed. 

It's easy enough to buy an adapter from the Quadlock plug to the standard ISO connectors, but they will have one or two wires not connected to anything. One is for power on and the other is for the illumination.  The simplest, and an acceptable, solution is to connect them both to an ignition live feed.

From what I can find on the internet, there are a couple of places to get this feed. 

A possible location is the Anti-Slip Regulation (ASR) switch, which is usually near the radio. The trouble is, I could not find any details of the wiring, so I do not know what current rating the feed has, nor what fuse it is attached to. I could have tested the wires to determine which to use but I'd rather a known quantity.

The other suggested option is Fuse 19, which I prefer. 

Fuse 19 

This is Fuse 19 in the top fuse box. That is designated for, among other things, radio and navigation systems. It is a mini 5A fuse. 


To get to the wire, it is necessary to remove the passenger side dash panels. This is a few screws and a couple of pull off panels. An easy job but takes a few minutes. 


Once the panels are removed, the top fuse box can be unbolted and I found there was just enough slack, that with a little care, I could slide it out sideways and have good access to the rear cabling. 

Fuse 19 is one of the tiny fuses in the middle. 4th in from the right. The feed comes in, from the ignition, on a brown/green wire and exits on a brown/red wire. 

I spliced into the brown/red wire. 


==

Other similar articles:

https://audiotechdirect.com/blog/vw-transporter-t5-stereos-installation/

==


Monday, 4 October 2021

Defender Puma heated seat electrics

We already had the Exmore Trim heated seat elements in the seats in Shelley's car. I wanted to wire them in using the original Land Rover switches.


It was easy to find a set of switches on ebay with the connectors. I'm not keen on them being pre-wired but that's how they came. Land Rover's standard wiring has the heating element controlled directly by the switch. I was unable to find out the current limit of the switches, nor the current draw of the Exmore Trim heating elements. All I know is that they use a 20A fuse for the pair.

It is safe to assumed, that the seats draw less than 10A per seat. I didn't want to take any chances with the Land Rover switches, so I have run them to relays.

The above is the updated circuit diagram with the heated seat switches connected via fuse 33. I also ran cables ready for a Sub-Woofer. The positive feed is shown in the above diagram, connected via fuse 32.


I was able to buy the contact pins that fit the standard Land Rover fuse boards, so I was able to use two of the spare ways in the under dash fusebox, to fit the fuse for the heated seat switch feed and another for the sub-woofer power. Both are switched from, what is called, the Window relay. That relay feeding various things, like electric windows and heated seats, when fitted, plus the windscreen wipers.

It's a bit tricky to access the fusebox because, although it can be unbolted, it does not fit through the opening in the dash. I managed to do what I needed.

I had a bit of luck with the feed for the power to the seats. There is an unused fuse in the under seat fusebox. Fuse 4. I happened to have the right spade connected to add in to the plug in that fusebox to connect to Fuse 4 and that fuse is marked as 20A. Perfect for my needs.


I ran a wire from the under bonnet ground stud to an unused stud under the seat. That probably wasn't necessary but with a definite negative connection to the under seat point, I was confident using that for all the negative connections.


I made up some harnesses and threaded them out in to the engine bay and under the car to the UK drivers side seat box. In that box are the two relays. They are attached to the relay brackets handily provided by Land Rover. From there another cable runs to the UK passenger side seat box.


It's just a job of terminating all the wires and plugging them together.

==


Thursday, 9 September 2021

Hot box

It is often convenient to be able to put tools away while they are still hot. To make this safe, I keep my soldering irons and hot air guns in metal cases but it is necessary to keep the hot ends away from anything else, including their own leads.


Having added a rework station to my collection, I needed a different box. For this, I have used a large army style ammo crate.


I've added divisions inside to separate the hot ends from the other items in the box.


I got carried away. I've sprayed it a gun metal colour...


and stencilled some lettering.


==


Tuesday, 31 August 2021

Home made twisted pair audio cable

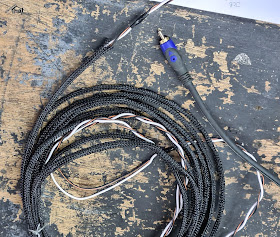
I'm not sure if many people would appreciate my reasoning but I decided that I could make a slightly tidier job if I used a twisted pair cable to connect up the sub-woofer in Shelley's car, rather than a long RCA (phono) cable and an adapter.


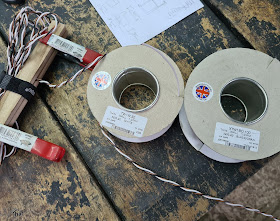
I could buy twisted pair cable but for a one off job I decided I might as well make my own. To that end, I rigged up a tool out of short lengths of timber and some spring clamps.


I use the spring clamps and timber, rather than the vice, so that the cables do not get crushed. I use the same thing when holding wires to be soldered


I spun one end by hand, doing about 40 full turns per metre of cable length. When I stopped to add more length, I put a bit of tape round, just to keep the cables together. Cable gauge and twists are all guesswork but I'm confident it is better than I need.


It took less than an hour to make over 5m, including cutting the timber and threading the outer sleeve.


==


Sunday, 15 August 2021

Defenders update

A lot has gone on with Shelley's Land Rover Defenders over the last few months. It all started back in May, after someone drove in to Fender and wrote it off. Shortly after, we purchased another Defender and we have been bringing that back to the same configuration as the previous one.


The new one has been named, Thunder Truck. It is 11 years newer than Fender but is still over 11 years old. It has a 2.4 TDCi engine, usually called a Defender Puma after the Ford name for the engine.


Fender had done over 250,000 miles. This one is a mere youngster with less than 100,000 on the clock.

Most of the jobs we are doing to Thunder, are jobs that we had previously done to Fender.


Convert it from a van to a pickup.


Swap over the rack from the remains.


Fit more appropriate wheels and tyres.


Fit a double DIN size stereo and replace the speakers.


There are a couple of new things. One odd thing is a hand made dip stick for the coolant because the tank is too close to the bonnet and not easy to see through. A new feature is a lock box in the back, to free up space in the cab.


The rear rack has a cover.


Another convenience is a glove box which very neatly fits on the passenger side of the dash. It was so obvious, I have no idea why Land Rover did not fit one themselves.


The jobs are getting more time consuming. I've started to thread the cables to eventually fit central door locking.


There are plenty more jobs left on the list.

==