Internal Hose Routing
There are plenty of videos showing how to fit dropper posts, so I'm not going to repeat those excellent tutorials, however, what many of them assume is that you are replacing an existing dropper.https://www.youtube.com/watch?v=f1__XVOjkvo
https://www.youtube.com/watch?v=4Ei6GlmPlAo
I was threading a hose through the frame of a bike that had not had a dropper before. That makes getting the hose in place a whole lot more difficult. The reason I chose the Rockshox over other makes was because, apparently, the hydraulic solution is more tolerant of tight bends. I'm glad I did.
I thought I might be able to use the cable threading fishing tape and rods, that I already have, to get the hose in without removing the bottom bracket from the frame. I was wrong, the local bike shop was right! I had to remove the bottom bracket.
https://www.youtube.com/watch?v=yOJAKBQOU9U
https://www.youtube.com/watch?v=E0CDaxwbd5c
Luckily, one of the many articles I looked at mentioned to watch out for the spacer (4.5mm) on the right hand, chain-ring, side. It would have been very easy to miss that. It just pulls off or drops off while you are not looking and rolls under the work bench!
I was glad I had bought a drifting tool designed to remove push fit bottom brackets. Without that I don't think there was any chance I would have got the job done. I only bought a budget tool from Amazon. It needed the splines bent out a fraction but worked fine. I needed to use a lot more force than I was comfortable with but the job needed to be done.
I'm pretty sure that drifting out the bearing housing from the frame is very likely to have misshapen the bearings. They still run, just, but if I was doing it again, I would have bought a new bottom bracket, rather than re-use the one I took out. A new bottom bracket is on order.
Tips:
|
I wasted a fair bit of time trying to fish through the frame. Once I had the bottom bracket out, I could see that was never going to work.
There are flanges, lips, where the tubes join. It was hard enough getting past the flanges when I could fish in there from both ends.
With the hose routed, the rest of the jobs were relatively easy. The bearing press I had ordered had not arrived, so I used a long M14 bolt with some big washers, which I had to hand.
It needed some care to ensure it was pushing in straight but the nuts, bolt and washers, worked perfectly as a bearing press.
Everything else was as per the SRAM video.
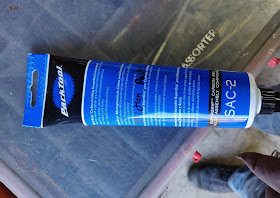
Sanding the inside of the top tube, using friction paste, torquing up the saddle stem, adjusting the length of the hose for the handlebar remote and fitting the remote.
Not forgetting to slide on the grommet before attaching the remote.
Finally fitting the saddle. By which time it was late and very dark, so I test rode it the following day.
==
External Hose
That next day, I fitted the externally routed hose on my brother's bike. That was much easier.
I 3D printed some hose guides so that it did not touch the tyre or anything else when in the dropped position. It needed two guides but they worked well.
https://www.youtube.com/watch?v=ZNG7g83lI-s&t=51s
Although I have managed to get it working, it is not very positive. I'm fairly confident that too many of the components, including the chain-rings are just too worn.
As a side note, I found a way to stop the rubber ends falling off my work stand clamp. As simple as a couple of cable ties!
Roy's Whyte is now in a rideable condition and my Giant has a nice new dropper post, ready for those steep hills.
==
Download 3D models:
Dropper Tube Guide, STEP, Fusion 360 and STL files (Zip)
Licence attribution - small business exception
==


No comments:
Post a Comment