I did not do things in the right order, so as a first step, this is the order I would recommend removing bits so that other bits either support what you are doing or are free to allow something else to be removed:
1. Remove the bezel round the interior lock button
2. Remove the trim under the door release handle
3. Remove the window winder handle
4. Remove the door pull handle
5. Unclip the two visible trim clips. These have a plastic push through centre.
6. Lever up all round the edge of the door card to release the hidden trim clips
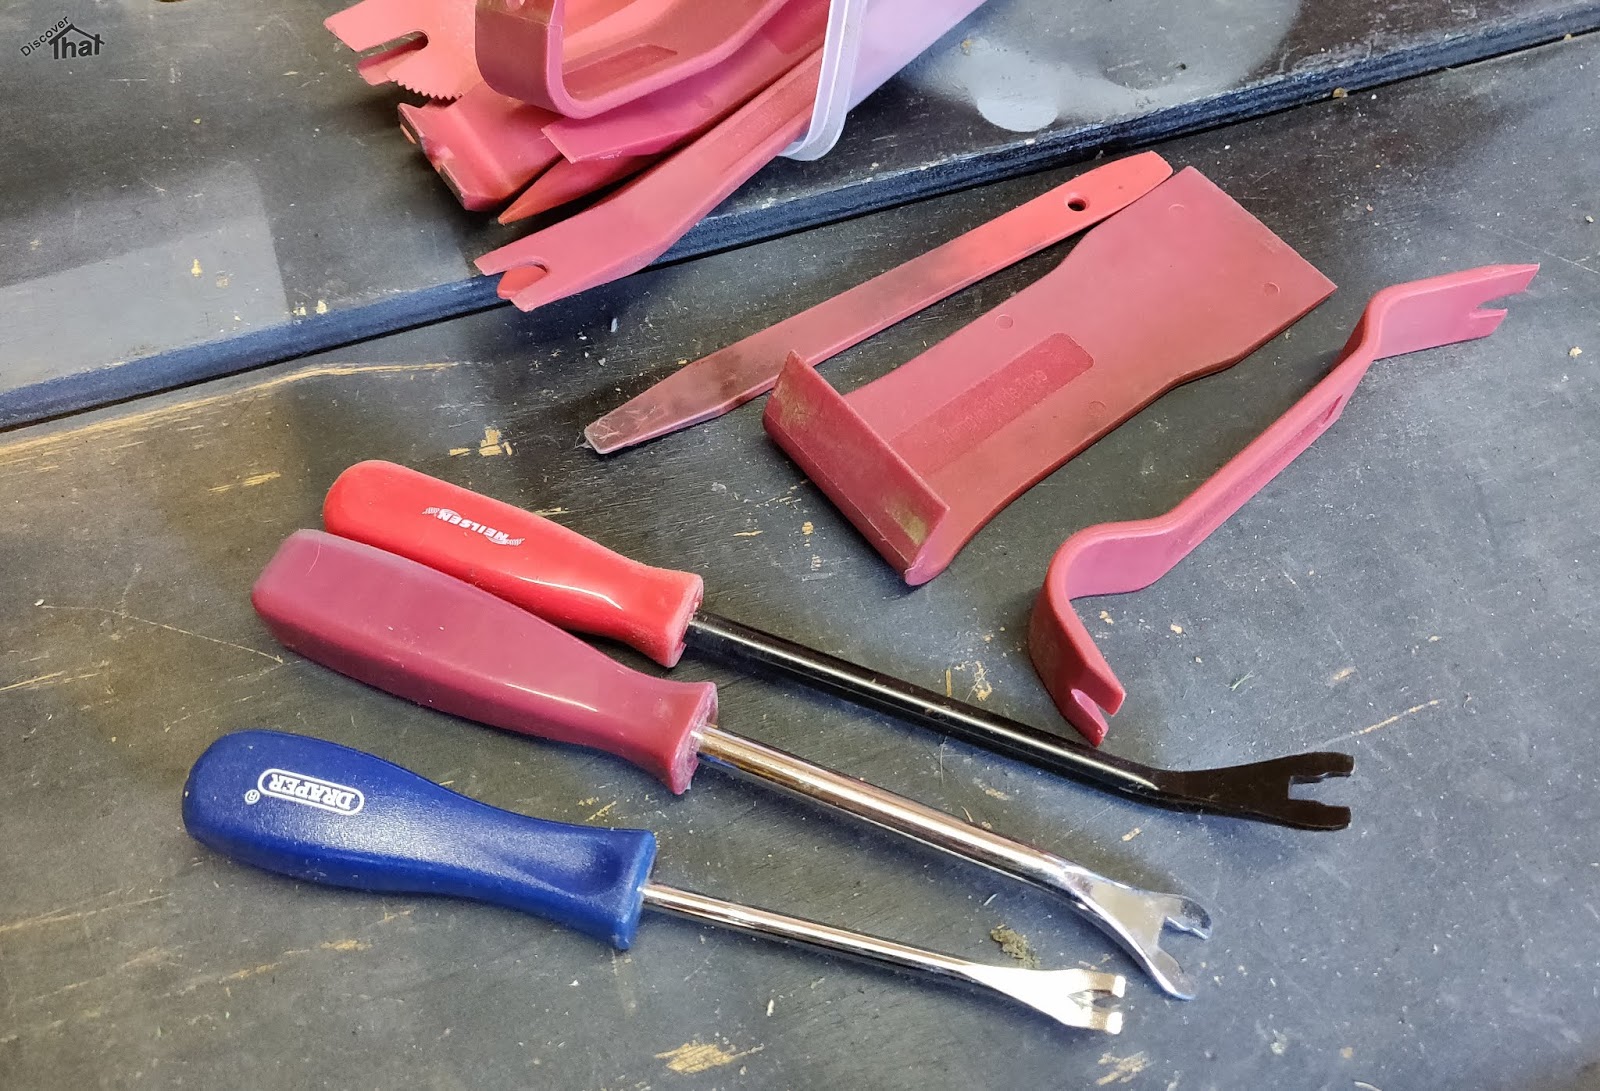
I highly recommend having a set of trim removal tools. They are relatively low cost and the various shapes and types of tool make removing the assorted clips much easier. For the defender doors I only needed the one tool for the bulk of the clips. Just a large plastic lever.

I would also recommend buying a set of spare trim clips before starting. Some will break and some will mysteriously go missing, as small bits on cars always do.
There are several suppliers on e-bay selling kits with just the right numbers and types of clips for Defender doors.
Interior lock button
This is made of three plastic parts. The escutcheon or bezel, the button and the guide that the button runs in. That last bit is screwed to the door.
To take the door card off, only the escutcheon has to be removed.
The bezel round the lock button is tricky to remove. It is held in place by two semi spherical nodules that drop in to holes. The top is held in position by a slide which is towards the outside of the door, hidden behind the push button.

The rear clip slides in an open topped slot.

The escutcheon must be pulled straight upwards to avoid breaking the rear slide. I found I had to use a lot more force than I felt comfortable with and a lever under the surround, to get it off. Eventually the escutcheon just pops up. It helps to understand where the two side nodule clips are.

This was much easier while the door card was still firmly attached to the door.

Refitting the button bezel is easier, just slide it from above. I made sure that the rear slide was aligned with it's slot and I just push down hard to get the side clips to pop in to place.
Release handle trim
This is fairly easy, it's just one screw at the lowest point in the handle recess and a clip towards the back of the handle.

Pull the handle to gain access to the screw and remove that.

Push the surround towards the rear of the car and lift the back out slightly to release the rear clip. Pull the handle then the surround should easily slide forward and out.

When putting it back I had to push it hard towards the back to get the rear clip to drop in place but then all that was required was to put the screw back in.
I found this fairly easy but only after I looked up how it worked.
There is a wire clip round the splined spindle.
I made myself a couple of small hooks. I tried wire but I found a flat bit of scrap metal was a bit easier to hold.

With the door card pushed in a little it was just a case of hook the rear of the clip and pull it out. It was a bit fiddly.
There is a proper tool for this which pushes from the other side and opens the clip at the same time. It was too expensive for occasional use.

Window winder refitting
It can be tricky to refit the window winder. I needed to line up the spring clip and push at the same time.

I partially fitted the clip before fitting the handle. That held the clip in place while I pushed with something thin.
I tried a screwdriver which was OK but better still I had a furniture tack remover which is a bit like a screwdriver but has a cranked end. That was easier to get in position.
The spring clip does not push fully home. It is supposed to be a few millimetres away from the shaft of the handle. There are plastic marker posts that stops the clip at the correct distance. I don't know if that is deliberate.
Door pull handle
I nearly didn't type any notes for the door handle but it occurred to me that there has to be a first time for everyone.
Like every car interior handle I have ever taken off, there are clip in covers over the screws. A small screwdriver or knife can be pushed in to the small gap and the cover pivots away.

Take it gently, the plastic hinges are prone to breaking away. Luckily, they usually click back in to place, even if the hinge end has broken.
Until the handle is removed the door card is still held firmly in place.
Visible trim clips
There are two trim clips that are on show from inside the car.
One clip is near to the top hinge and one in the opposite corner. These are the expanding rivet type. Prior to use, they have a pin that sticks out. When installed the pin is pushed through until flush. This expands the legs of the clip to hold it in to a plastic receiver (part number MWC9917) or sometimes just a hole.
To get this type of clip off, I use a flat ended rod of a similar size to the centre pin. I used to use a drill bit but as I've done these so often, I ground down a small nail which I keep with my other trim tools.
I push the pin in a little and pull with a trim clip remover at the same time. I usually have to inch it out a little at a time and push the pin in further and repeat. If the receiver that should be in the door is missing the pin often pushes right through and it's easy to pull out.
If it is stubborn you can carefully cut the top off with a knife and discard it. That risks the fabric on the door card so I don't like doing that.
More likely the whole clip and receiver will pull out of the door. You then have to prise the pair apart or cut it off.

If you recover the pin and still have a complete clip, you can usually reuse these a couple of times.
Hidden clips
The first time you remove this type of hidden clip it is normal to be a bit hesitant. Even the cracking noise they make as they pull out is a bit disconcerting but basically it's necessary to just lever the door card off.
I usually work round the edge of the door card, slightly pulling to feel where the clips are. I put the lever in as close to each clip as I can without damaging the door card to do so. The lever is just pushed between the door metal and the door card and lever out a little so the plastic clip starts to pop out.
To minimise the chance of breaking the door card, I prefer to do each clip a little and work round the door then release fully on the second pass.

Invariably, some clips will break off instead of pulling out, which is why buying spares in advance is a good idea.
Pull the remains out with pincers or push them in with a screwdriver depending on how much they are broken.
Most of the time, it is the removable part of the clip that will break but you may also be unlucky and the hard plastic clip attached to the door card might break!
These are moulded in to the door and cannot easily be replaced. Some clips don't matter much if one is missing but if more than one is missing or if it is a particularly critical clip, the door card will not stay in place properly.
 |
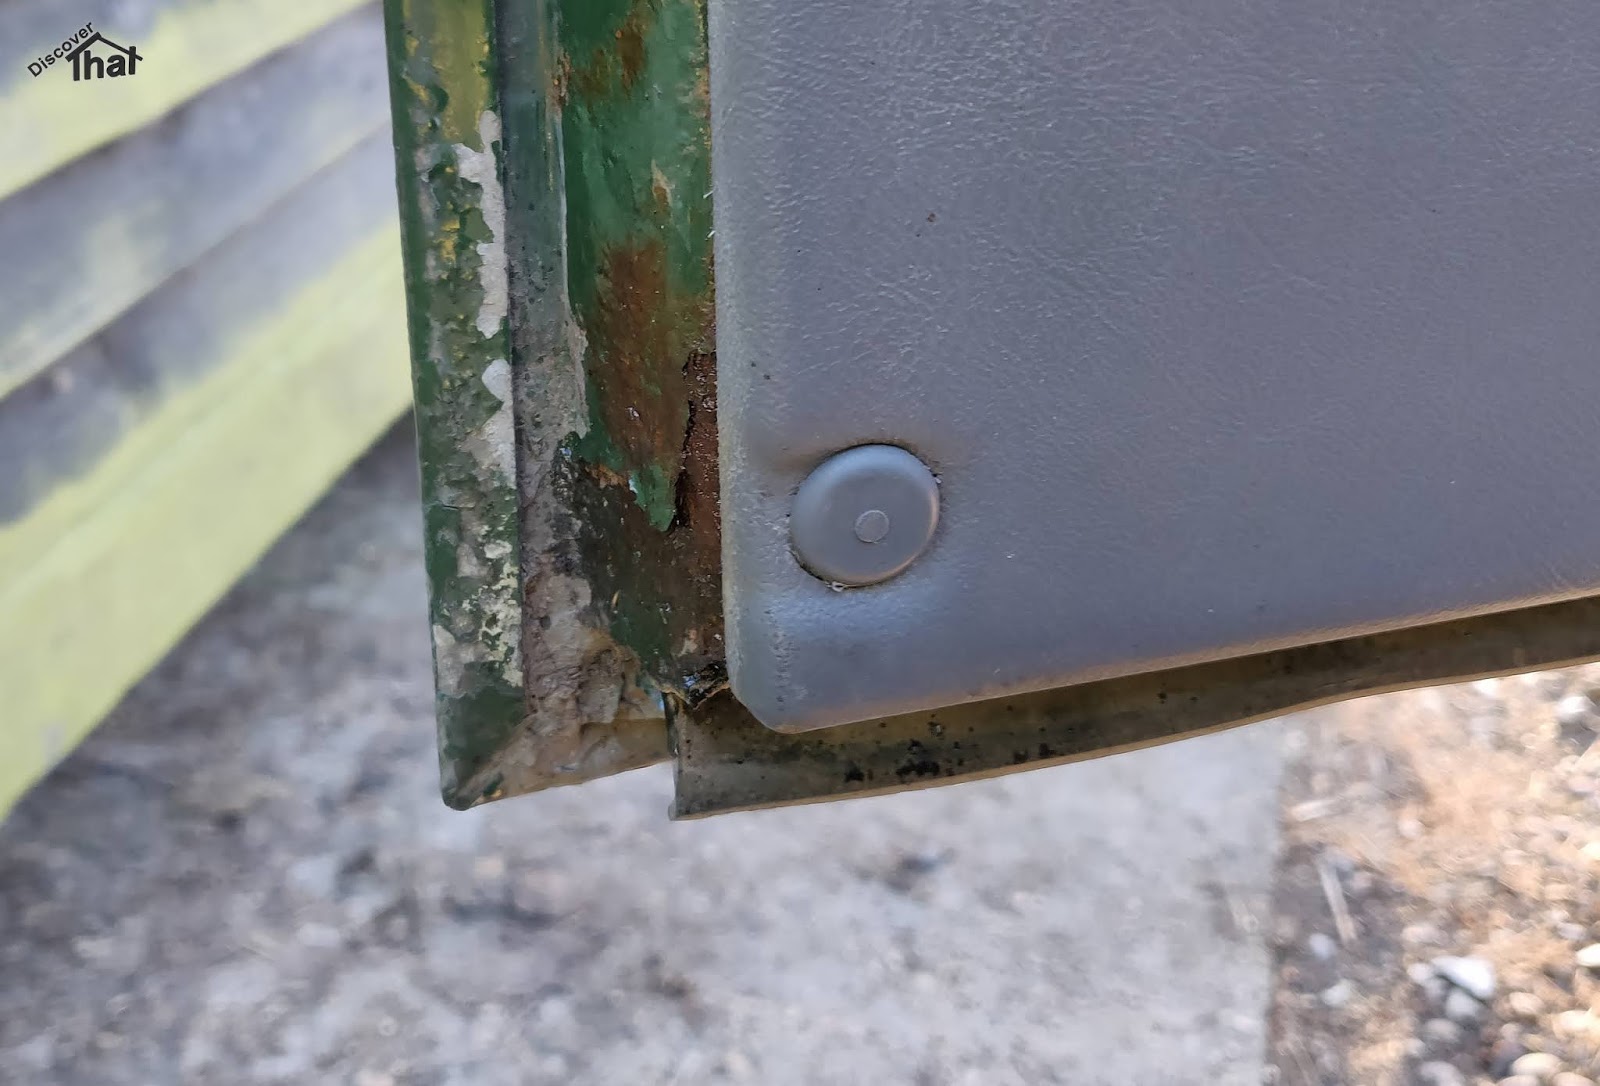
| How someone else left it |
Some people bodge this by simply putting a screw from the outside. I do not like this although I can understand why, as a last resort, people do it.
I prefer to repair broken clips invisibly. In most cases a screw can be used to replace the broken bit from the rear of the door card.

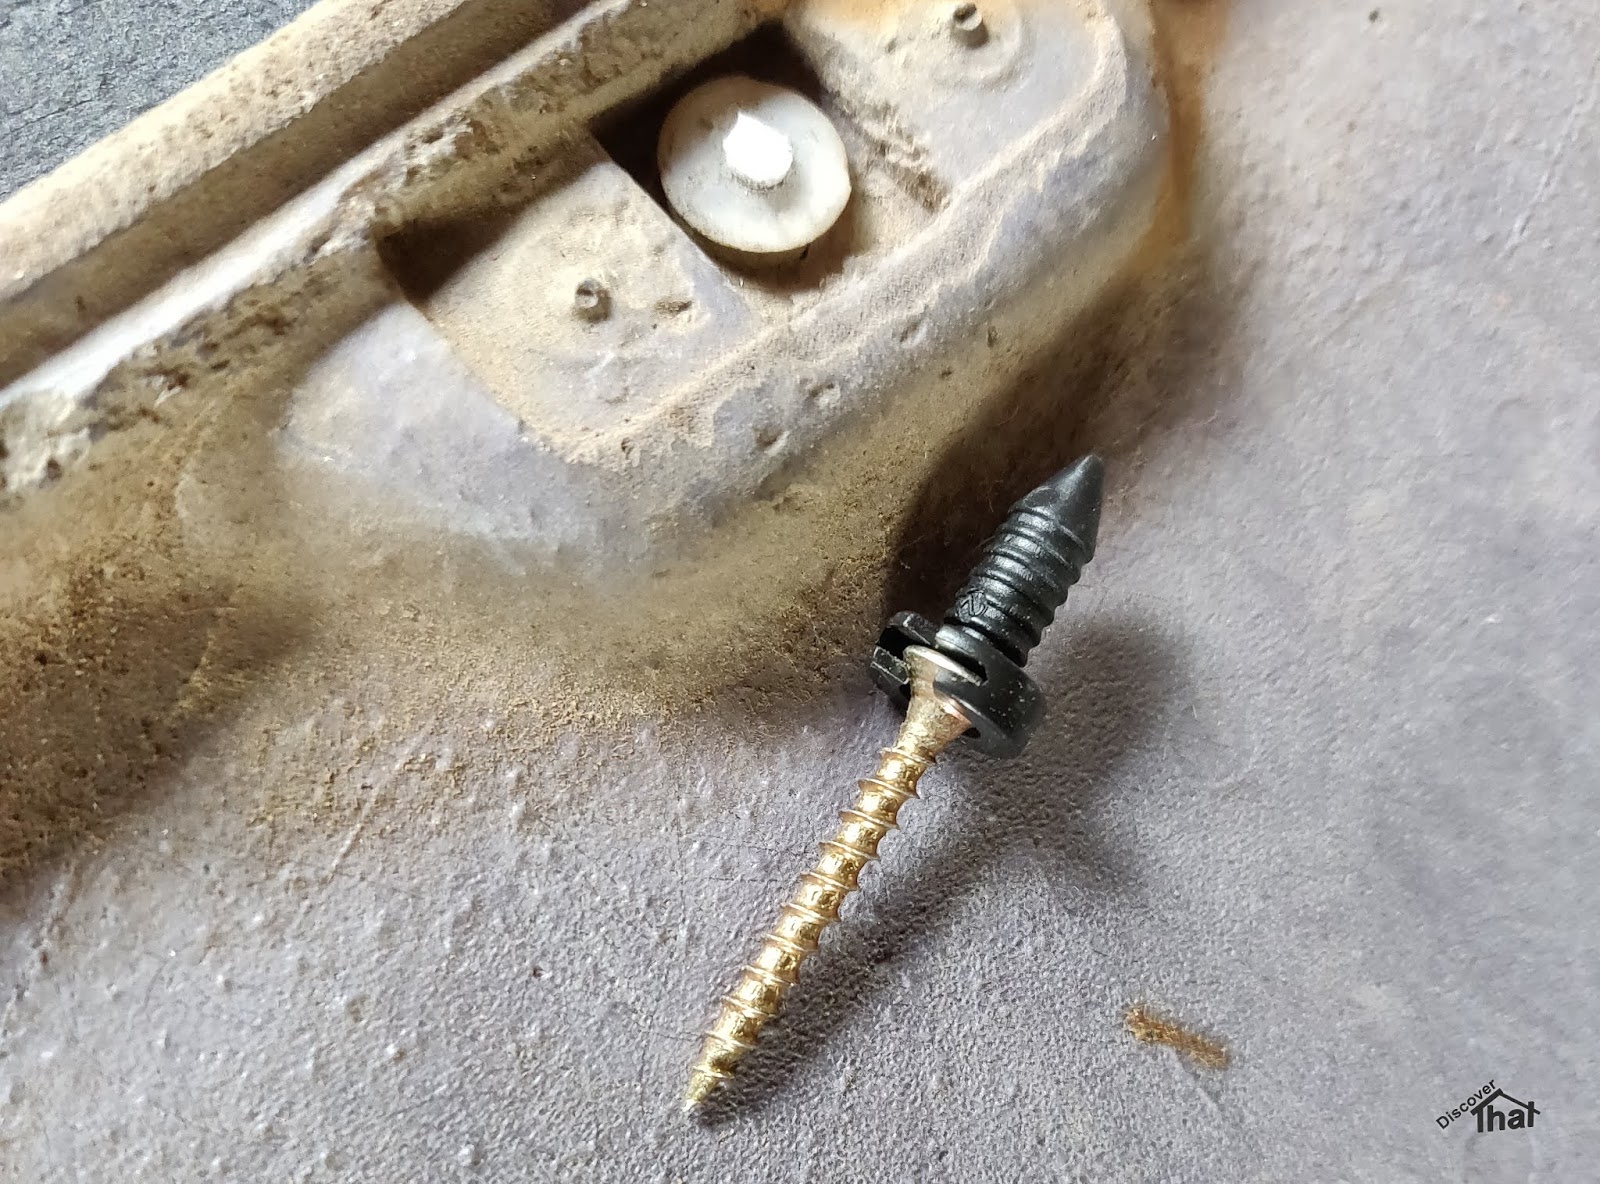
In the case of Land Rover Defender door cards, I have found that a 3.5mm countersunk head wood screw will do the job. It is fairly specific, the heads on a 3mm and 4mm wood screw are usually the wrong sizes. Check the clip fits before starting.

I cut a screw down with bolt cutters or a hacksaw so the screw has only about 5mm of thread.
I drill a 2mm or 2.5mm hole through the centre of what remains on the back of the door card being careful not to drill out the other side.

I use another screw, of the same size, that is still complete with it's point, to start the thread in the newly drilled hole. Be very careful to avoid the point coming through the other side. It just needs to be enough to start the thread then remove that screw. Put in the shortened screw in the thread already started by the full length screw.

It can be tricky to get it in square but it does need to be in square. It also needs to be raised enough to fit the clip under.

The clip can be pushed on as with the original. Just as effective.
Door card repairs
The door card I removed was cracked or split in a couple of places.

I simply used Superglue (Cyanoacrylate, CA) gel in the crack in the foam backing, making sure the joint was compressed together until it was set.
Rusty doors
The door inner frames of our Defender, like many Land Rovers of that age, are very rusty.

The drivers door was so bad I had to do a stop gap repair just to be able to put the door card back on! I filled the lower section with a lot of Isopon P38 filler.

I originally intended to repair the doors with new steel sections but there was more rust than expected. The repair sections I would have needed were about £60 each and would need a lot of work to weld them in to place. New doors were £300 each. I opted for new doors. These are currently away being painted.
==
Related articles:
https://blog.discoverthat.co.uk/2018/07/fitting-defender-central-door-locking.html
External links:
http://la7dja.org/defender/cdl/
http://www.retroanaconda.com/landrover/2009/10/installing-remote-central-locking-on-front-doors/
==
1 comment :
Fantastic blog.
Many thanks
Archie
Ps. Got anymore?
Post a Comment