
From past experience I know this is most likely caused by a faulty height sensor. If the suspension drops overnight it is most likely a leaking bag, if it raises to full height it is most likely a faulty height sensor.
A quick search on the Internet found a very useful blog post. I've saved this as a PDF for future use.
That article warns that an over inflated air bag risks exploding and therefore could be dangerous if the car is driven.

Luckily I had spare sensors in my stock of parts so I planned to swap out the faulty one. The instructions suggested loosening a valve to deflate the air suspension before carrying out the work however I have a Nanocom for the TD5 which can control the SLABS, so I plugged that in to lower the suspension without having to open up the compressor box.
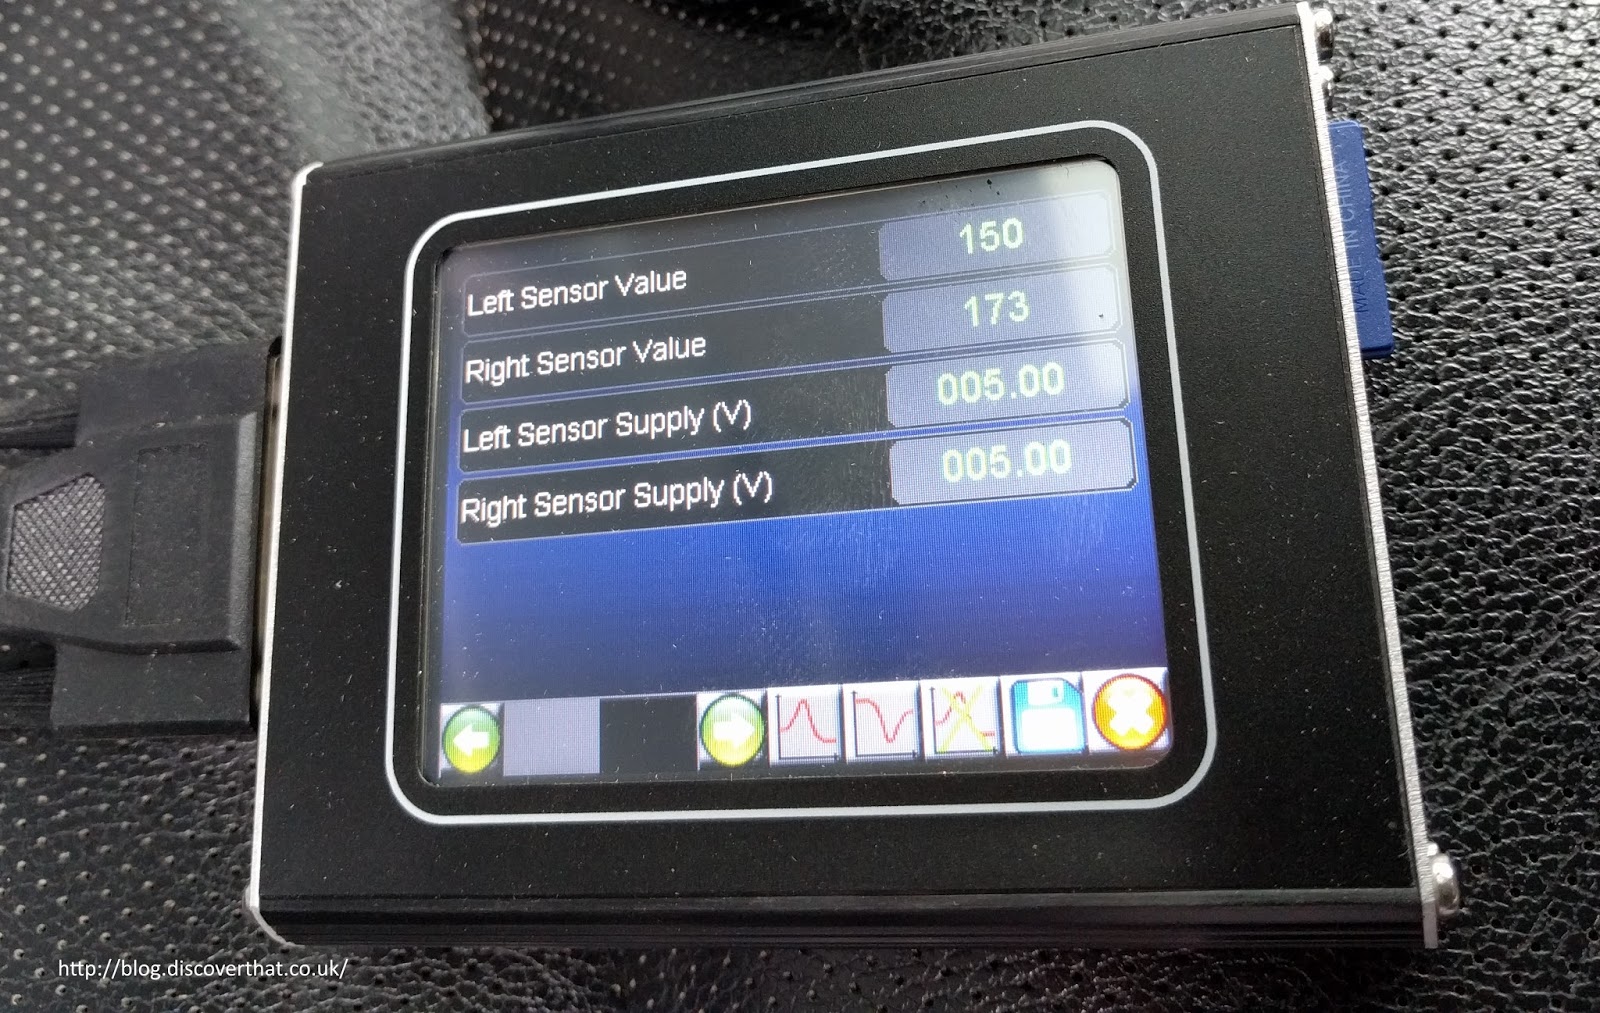
The Nanocom can also read the settings and much to my surprise the sensor was still showing movement. Just by bouncing on the car it was easy to see the values change! Perhaps my 2 minutes of brushing away the mud from the sensor pivots had done some good.
Without replacing the sensor, I used the Nanocom's SLS calibration utility to raise and lower each side until I got both sides level. It only works with the engine running and all the doors and bonnet closed. I opened the window so I could make changes and more easily measure the heights.

It's a bit trial and error as lowering one side also slightly lowers the other so that side then needs raising to compensate. Each press of the raise or lower button on the Nanocom moved the corresponding air spring by about 1cm.
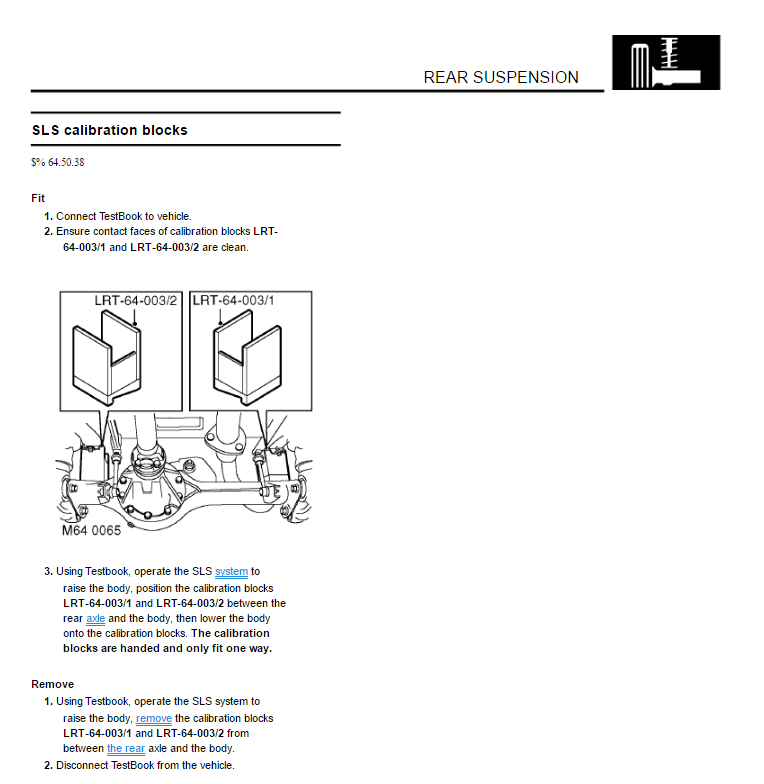
The workshop manual uses calibration blocks but I know from looking in the past that these are expensive and I don't know anyone who has them. Most people, myself now included, just measure from the centre of the wheel to the highest point of the wheel arch.
I don't know what the correct heights should be so for the time being, until I know better, I have assumed that the car should ride level and matched the rear heights with the front heights at 47cm. I have standard size wheels and tyres and normal height suspension.
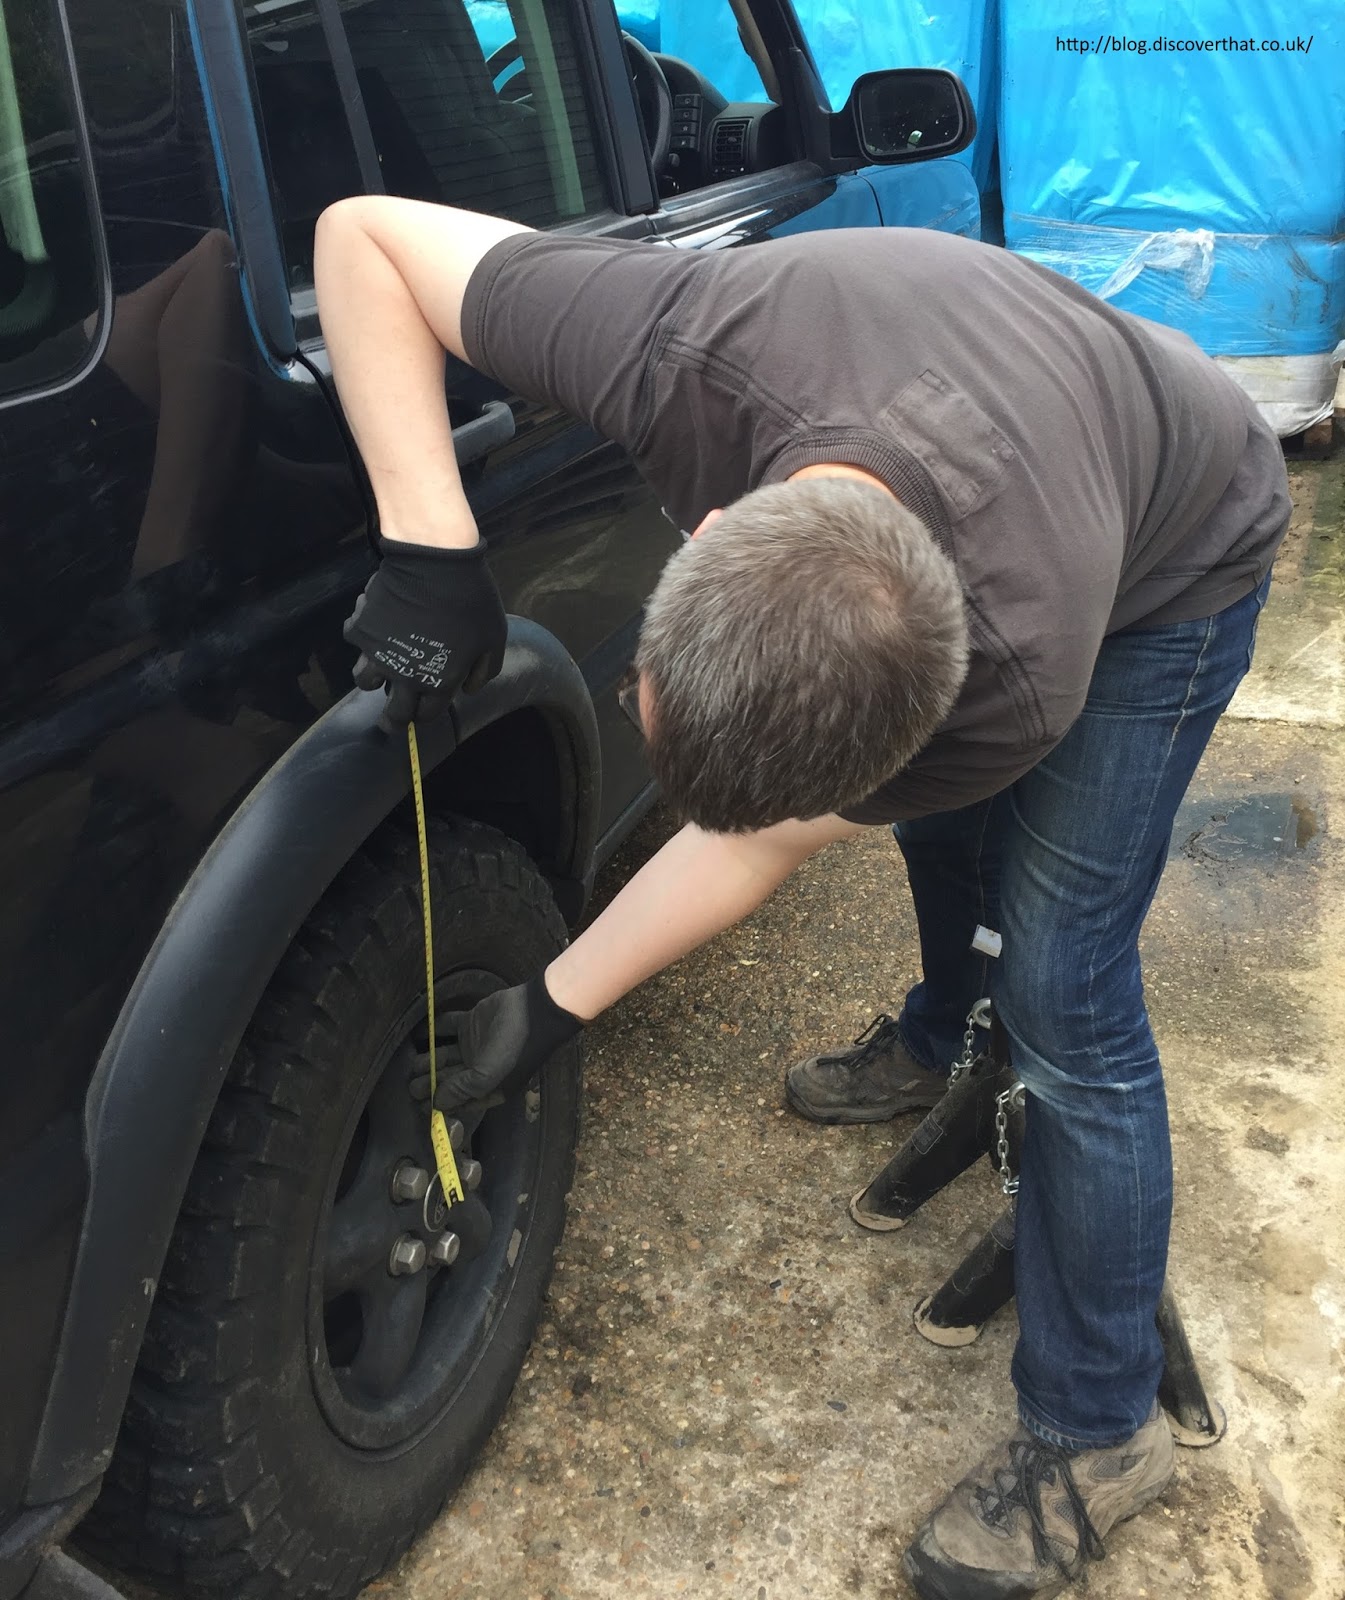
When I started, the left side was just over 50cm and the right side only 46cm.
After having made the adjustments I pressed the 'Store Heights' button. It then instructs you 'To load to the ECU turn off the ignition and wait 60 seconds.' I did as instructed.


It had well over 60 seconds because it took me a while to get the cat off the roof before I could head out for a test drive. The roads round my way are quite uneven and at one point in our single track road I had to pull over on the grass to let another car past so the suspension got a good work out on the 10 minute run.
I measured the heights when I returned, while the engine was still running and both sides were still at 47cm. Hopefully that's sorted but I still have the option to replace the sensor if it should re-occur.
==
Since carrying out this work I have been told on Facebook and found on a forum that the correct height for the suspension is 61.5mm (2.42") measured from the tip of the bump stop rubber to the axle. I have been unable to verify that measurement from any definitive source.
 |
| D2 Workshop manual 99MY extract |
The nearest confirmation of the calibrated size, that I can find, is the above reference in the workshop manual which indicates the distance must be at least 60mm.
I'd be interested to know if the exact size is mentioned in a newer workshop manual.
==
1 comment :
Thanks for sharing this post. I was wondering how to balance both sides of my Disco, as one is slightly off. Out comes the tape measure!
Post a Comment